Tampilkan postingan dengan label Apple-iPod-Touch-Tips-Tricks. Tampilkan semua postingan

Senin, 06 September 2010

How to make FaceTime video calls on iPod Touch 4G

How to make FaceTime video calls on iPod Touch 4G

As you all know by now, one of the coolest new additions to new iPod Touch 4G is the FaceTime feature that allows you make video calls to friends and family across the globe. The FaceTime feature allows you make video calls to other iPod Touch 4G and iPhone 4 over WiFi. Read more...

This feature is made possible by 2 new cameras introduced on the iPod Touch 4G. One on the front, which focuses on you. And one on the back, which focuses on what's in front of you. Note that FaceTime lets you switch between them at any time during a video call.

How to accept & make FaceTime Video calls on iPod Touch 4G

  1. All you need to get started is an Apple ID and an email account. You can choose an email account you already have or, if you prefer, set up a new one.
  2. Make sure your iPod Touch 4G is connected over a Wi-Fi connection which is the mode of communication for the FaceTime Video. (If you want more info on iPod Touch Wi-Fi settings visit How to connect and manage iPod Touch Wi-Fi).
  3. Making the actual FaceTime video call is as simple as it gets:
    1. Just tap the FaceTime app.
    2. Find the person you want to call.
    3. An invitation pops up on their iPod touch or iPhone 4 screen asking if they want to join.
    4. When they accept, FaceTime begins.
  4. Receiving a FaceTime Video Call:
    1. If somebody wants to start a video call with you, you'll receive an invitation - along with a vibrating alert - on your iPod touch asking you to join.
    2. Simply tap Accept, and the video call begins.

Senin, 07 Juni 2010

iPod Touch Bluetooth Setup with Stereo Headphone or Car kit

iPod Touch Bluetooth
The iPhone 3.1 Software Update has a feature that allows users to listen to music wirelessly using the iPod Touch Bluetooth feature with a bluetooth stereo headphone (A2DP) or car kit. This iPod Touch Bluetooth feature is only available from the 2nd generation iPod Touch onwards.  Here is the step-by-step instructions on how to setup and pair a bluetooth stereo headphone or car kit using the iPod Touch Bluetooth feature.
Read more...

Pairing Bluetooth headphones or car kit with iPod touch

  1. You need to first make the bluetooth stereo headphone discoverable by other devices. To do this just follow the instructions that came with the headphones to make them discoverable.
  2. Then on your iPod Touch go to Settings, choose General > Bluetooth and turn Bluetooth ON.
    iPod Touch Bluetooth
  3. Select the headphones from the list of Devices that is displayed and, if prompted, enter the passkey or PIN number. See the instructions about the passkey or PIN that came with your headphones.

After these steps of pairing the headphones with iPod touch, the headphone product name and a Bluetooth audio icon appear on the iPod touch status bar at the top of the screen when you are viewing audio or video playback controls. Tap to switch to a different audio output, such as the internal speaker.

The Bluetooth icon appears blue or white, if the bluetooth is on and a device is connected to iPod touch. Note that the color depends on the current color of the status bar. If the Bluetooth icon is gray in color it means that Bluetooth is on but no device is connected. If you’ve paired a device with iPod touch, it may be out of range or turned off. if there is no Bluetooth icon it means that the bluetooth is turned OFF.

Un-pairing or removing a Bluetooth headphones or car kit from iPod touch

If you’ve paired iPod touch with one Bluetooth device and want to use another device instead, you must unpair the first device.

  1. In Settings, choose General > Bluetooth and turn Bluetooth ON.
  2. Choose the device and tap "Forget this Device".
    iPod Touch Bluetooth

iPod Touch Bluetooth Problems and issues

Unable to find nearby Bluetooth devices

  1. If a pairing record already exists, the device does not appear as discoverable. Try to connect the device using that pairing record, or delete the record and pair again.
  2. Ensure that the firmware or software on the Bluetooth device is up to date.
  3. Ensure that the Bluetooth device is charged or connected to power.
  4. Verify that the Bluetooth device is using a profile that works with the iPhone or iPod touch, such as Headset, Handsfree, or A2DP.
  5. Turn off both the iPhone or iPod touch and the Bluetooth device, then turn both devices on again.
  6. If the issue persists, test Bluetooth with another device or consult the manufacturer's documentation.

Unable to pair with Bluetooth device

  1. Ensure that the Bluetooth device is in range. Most devices have a range of approximately 30 feet.
  2. If a pairing record already exists with the Bluetooth device, the device will not show up as discoverable. Try connecting the device using that pairing record, or delete the record and try to pair again.
  3. Ensure that the firmware or software on the Bluetooth device is up to date.
  4. Verify the PIN for the device. You may need to refer to your manufacturer's documentation for this.
  5. Ensure that the Bluetooth device is charged or connected to power.
  6. Turn off both the iPhone or iPod touch and the Bluetooth device, then turn both devices on again.
  7. If the issue persists, test Bluetooth with another device or consult the manufacturer's documentation.

Cannot connect to a paired Bluetooth device

iPod Touch Bluetooth
  1. Ensure that the Bluetooth device is in range. Most devices have a range of approximately 30 feet.
  2. Delete the pairing record and pair again.
  3. Ensure that the firmware or software on the Bluetooth device is up to date.
  4. Ensure that the Bluetooth device is charged or connected to power.
  5. Turn off both the iPhone or iPod touch and the Bluetooth device, then turn both devices on again.
  6. If the issue persists, test Bluetooth with another device or consult the manufacturer's documentation.

Senin, 24 Mei 2010

Gift Apps in the iTunes Store

imageApple has announced that users can now Gift Apps to others from the iTunes store. This can be done by using the down triangle next to an app's Buy button. You can also send the gift by email by just entering one or more recipient email addresses separated by commas. Read more...

You can also choose to print out a gift certificate to mail or give in person. You can also just spread the word instead by using the Tell a Friend option also available via the down triangle, and it lets you send an email from within iTunes by entering text and your friends' email addresses. Or you can use Copy Link and then paste it into a mail message.

Selasa, 23 Februari 2010

How to manage On-The-Go Playlists on the iPod Touch

Manage On-The-Go Playlists on the iPod TouchOn-The-Go playlist is a feature on your iPod Touch that lets you set up playlists on the iPod itself without having to use the iTunes.

Add songs to On-The-Go playlists

First go to your music, and tap Playlists, then On-The-Go, which appears near the top of the list. Browse for songs using the buttons at the bottom of the screen.

Tap any song or video to add it to the playlist. Tap Add All Songs at the top of any list of songs to add all the songs in the list. If you select an artist, composer, or album, you can choose Add All Songs at the top of that item's list, and if you select a genre, you can choose Add All Albums. Read more...

Edit On-The-Go playlists

To edit the playlist, tap Playlists, tap On-The-Go, tap Edit, then do one of the following:

  • To move a song higher or lower in the list, drag the rearrange icon next to the song.

  • To delete a song from the playlist, tap the red minus sign icon next to a song, then tap Delete. Deleting a song from the on-the-go playlist doesn't delete it from iPhone.

  • To clear the entire playlist, tap Clear Playlist.

  • To add more songs, tap the plus sign icon.

Sync On-The-Go playlists to iTunes

If you sync your iPod automatically, iTunes will copy the On-The-Go playlist, naming it On-The-Go 1, On-The-Go 2, and so on. The playlist on the iPod Touch itself is deleted. To put a playlist back on iPod Touch, select iPod Touch in the iTunes sidebar, click the Music tab, and set the playlist to sync. However, if the iPod is set to sync manually, then iTunes won't copy the playlists. If you want to save them, you'll have to recreate them on iTunes.

On-The-Go playlists are a great way to set up a soundtrack for a day's listening without using iTunes.

Minggu, 28 Juni 2009

How to transfer or copy iTunes purchases from iPod or iPhone to computer

You purchased items from the iTunes Store and for some reason you lost all your songs and other contents library that were on your computer. And now the only place you have them stored is on your iPod or iPhone. Worry not! With iTunes 7 or later you can easily transfer all the songs from your iPod or iPhone to any computer that is authorized for your iTunes Store account. Here is a step by step instructions on how to do this.
Show me more...

The first thing before transferring your iPod or iPhone contents to the computer is to authorize your computer. This needs to be done even before connecting your iPod or iPhone to the computer.

  1. Open iTunes and from the Store menu chose "Authorize Computer".
  2. A dialog box will appear in which the Apple ID button is select by default. If you have an AOL account select AOL.
  3. Enter your Apple ID or AOL screen name and password, then click the Authorize button.

NOTE: If you purchased from the iTunes Store using multiple accounts then you will need to authorize the computer for each one.

Now foolow these steps to transfer iTunes Store purchases from your iPod or iPhone to a computer:

  1. First connect your iPod or iPhone to the computer.
  2. If your iPod is synced with another iTunes library, the following dialog may appear.

    Transfer iPod music to Computer
  3. Click the Transfer Purchases button. iTunes will begin copying any purchases made with any account that the computer is authorized for.
  4. If you are not prompted by the dialog above, it could be that the option "Do not ask me again" was previously selected. Then you can do one of the following:
    • After connecting your iPod or iPhone to the computer and its icon appears in iTunes, you can choose Transfer Purchases from iPod from the File menu.

      Transfer iPod music to Computer

      OR
    • You can right-click (Windows or Mac) or Control-click (Mac only) your iPod in the iTunes Source list, then choose Transfer Purchases from the shortcut menu that appears.

      Transfer iPod music to Computer

Note that these steps will only help you restore content that you purchased from the iTunes store. Any items imported from audio CDs or acquired from other sources will not copy from your iPod or iPhone to the iTunes library.

Sabtu, 07 Februari 2009

Apple fixes iTunes Crashing after Firmware 2.2.1 upgrade

Since the release of the iPhone 2.2.1 firmware update, many users have had problems with iTunes crashing with both iPhones and even iPods. To fix this issue Apple has sent the following email to some of the affected customers that outlines the steps for fixing this issue.
Show me more...
Dear Customer,

Recently, we uncovered an issue which was causing iTunes to unexpectedly quit when synced with an iPod or an iPhone. This issue impacted a small number of users, and we have identified your account as potentially being affected.

If you have experienced this issue, please follow these steps in order to sync your iPod or iPhone with iTunes:
1. Launch iTunes
2. Select "Deauthorize Computer" from the Store menu
3. Enter your iTunes Store Account ID and Password, then click the Deauthorize button
4. Next, choose "Authorize Computer" from the Store menu
5. Enter your iTunes Store Account ID and Password, then click the Authorize button

Once you have successfully deauthorized and reauthorized your computer, you should be able to sync your iPod or iPhone to iTunes.

I sincerely apologize for any inconvenience that you may have experienced as a result of this issue.

Thank you for being an iTunes Store customer.
iTunes Store Team

This fix has now been available on the internet for some time now and users have been reporting that this fix does work. Drop a comment if you had this issue and if this fix works.

Rabu, 04 Februari 2009

How to increase iPod Touch battery life

How to increase iPod Touch battery life

Apple claims that the iPod touch gives up to 36 hours of music playback and up to 6 hours of video playback when fully charged. But many users since the 1st gen ipod touch have been complaining of significantly lower battery runtimes.

With such high-tech, power-hungry features and Apps that you're getting on the iPhone and iPod Touch, it's no surprise that you don't get the battery life that you'd like to. However, there are a number of simple ways to lengthen the time between charges, as well as prevent the premature need for battery replacement.
Show me more...

Temperature Matters

Your iPod works best from 32° to 95°F. You should store it in environments of -4° to 113° F. That’s 0° to 35° C and -20° to 45° C for the metrically inclined. Keeping your iPod as near room temperature as possible (72° F or 22° C) is ideal.

If the temperature is higher than 95° F (or 35° C), you may permanently damage your battery’s capacity. You may damage it even more if you charge the device in these temperatures. Even storing a battery in a hot environment can damage it irreversibly.

Cold environment is not good either. Cold environment may decrease the battery life. Unlike the effects of a hot environment, this is a temporary condition. Once molecules in the battery warm up, the battery will return to its previous capacity.

Charging your iPod touch while in certain carrying cases may generate excess heat, which can affect battery capacity. If you notice your iPod gets hot when you charge it, take it out of its case first.

Turn off Wi-Fi

Wi-Fi consumes power even if you are not using its features to connect to a network. You can turn it off to save power. Go to Settings > General > Network > Wi-Fi.

Switch Off Backlight and Equalizer (EQ)

Your iPod’s backlighting and equalizer features all consume power. Setting the backlight to “always on” will significantly reduce your battery life. Adding EQs to playback uses more of your iPod processor, since they aren’t encoded in the song. Turn EQ off if you don’t use it. If, however, you’ve added EQ to tracks in iTunes, you’ll need to set EQ to “flat” in order to have the effect of “off,” because iPod keeps your iTunes settings intact.

Minimize use of third-party applications

Excessive use of applications on iPod touch, such as games that prevent the screen from dimming or shutting off, can reduce battery life.

Fetch new data less frequently

Applications on iPod touch such as Mail can be set to fetch data wirelessly at specific intervals. The more frequently email or other data is fetched, the quicker your battery may drain. To fetch new data manually, from the Home screen choose Settings > Fetch New Data and tap Manually. To increase the fetch interval, go to Settings > Fetch New Data and tap Hourly. Note that this is a global setting and applies to all applications that do not support push services.

Turn off push mail

If you have a push mail account on iPod touch such as Yahoo!, MobileMe or Microsoft Exchange, turn off push mail when you don’t need it. Go to Settings > Fetch New Data and set Push to Off. Messages sent to your push email accounts will now be received on your iPod touch based on the global Fetch setting rather than as they arrive.

Minimize Fast Forward

iPod plays music out of a solid-state memory cache to provide skip-free playback and maximize battery life. If you fast forward through your playlist, iPod will need to fill its cache more frequently, thus accessing the hard drive more often and using more power. This will decrease overall battery life. By creating great playlists in iTunes that cater to your personal taste, you can decrease your need to fast forward. Using the shuffle feature may also help to minimize your use of the fast forward feature.

Use Compressed Songs

iPod’s cache works most efficiently with songs of average file sizes (less than 9 MB). If your audio files are large or uncompressed (including AIFF or WAV format), you may want to compress them, or use a different compression method, such as AAC or MP3, when importing them into iTunes.

Jumat, 30 Januari 2009

iPod Touch Wi-Fi Settings: How to connect & manage iPod Touch Wi-Fi network

Manage iPod Touch Wi-Fi networks
iPod touch automatically locates wireless hotspots (WiFi), including protected networks within a given nearby range. If it's a secure network--the networks are listed with a padlock icon--the touch will prompt you for a password. This will be one of the keys listed on your router's wireless configuration pages.

Once connected, verify that everything's working by using Safari to surf the Web. You can use the iPod touch WiFi to connect to the Internet using Safari web browser, YouTube, or iTunes WiFi Music Store.
Show me more...

How does the iPod Touch connect to the WiFi

When you use the Safari, YouTube or the iTunes WiFi Music Store, the iPod touch automatically does the following in order until it is connected:
  1. If you had previously connected, your iPod Touch automatically connects to the last WiFi network you used.
  2. If this is the first time you are connecting or if the previously used WiFi networks are not available, the iPod touch will scan for WiFi networks and show a list of networks in the range. Tap a network to join or connect to it. If the network shows a lock icon next to it then you need to provide a password to connect.
  3. If the WiFi network is configured not to broadcast or be displayed to the public an option to manually enter your WiFi network name/SSID is shown. If necessary, enter the password to join.

When iPod touch is connected to a WiFi network, the WiFi icon in the status bar at the top of the screen shows connection strength. The more bars you see, the stronger the connection.

How to change the iPod Touch Wi-Fi settings


To Turn iPod Touch WiFi ON or OFF

Choose Settings > Wi-Fi and turn Wi-Fi ON or OFF.

Set iPod touch to ask if you want to join a new WiFi network

When you are trying to access the Internet, by using Safari or YouTube for example, and you are not in range of a WiFi network you have previously used, this option tells iPod touch to look for another network. iPod touch will display a list of all available WiFi networks that you can choose from. Networks that require a password appear with a lock icon.

If "Ask to Join New Networks" is turned off, you must manually join a network to connect to the Internet when a previously used network is unavailable. Choose WiFi and turn "Ask to Join Networks" on or off. If you turn "Ask to Join Networks" off, you must join networks manually.

Join a WiFi network manually

Choose WiFi, wait a moment as iPod touch detects available WiFi networks in range, then choose a network. If necessary, enter a password and tap Join. Networks that require a password appear with a lock icon.


Make iPod touch forget a WiFi network

Choose WiFi and tap the arrow next to a network you've joined before. Then tap "Forget this Network" When you do this the iPod Touch doesn't join the network automatically.


Connect to a closed WiFi network or a network that isn't shown

Choose WiFi, then tap Other and enter the network name. If the network requires a password, choose Security, tap the type of security the network uses, and enter the password. You must already know the network name, password, and security type to connect to a closed network.


iPod Touch WiFi Troubleshooting Tips

If you are still having the following issues then follow the fixes below.

Issues:


  • iPod Touch shows no WiFi address (Tap Settings > General > About and scroll down to WiFi Address.
  • iPod touch appears to be connected to a WiFi network but cannot use Wi-Fi for checking email and surfing the Internet.
  • iPod Touch WiFi icon is showing as grayed out.
  • When you tap Settings > WiFi and then you see no network entries.

Fixes for iPod Touch WiFi issues:

First you need to back up your data by syncing your iPod touch to iTunes. It is very important you do this before proceeding with the fixes below.

Fix 1:
On the iPod Touch go to Settings > General > Reset and then select Reset Network Settings. Now see if the device displays the WiFi address under Settings > General > About and scrolling down to WiFi Address. If there is a WiFi address listed then you issue is resolved. Else try Fix 2 below.

Fix 2:
On the iPod Touch go to Settings > General > Reset and then select Erase All Content and Settings.  Now see if the device displays the WiFi address under Settings > General > About and scrolling down to WiFi Address.  If there is a WiFi address listed then you issue is resolved. Else try Fix 3 below.

Fix 3:
If the above fixes don't work then the only thing left is to restore the iPod touch software using iTunes which will erase all data on the device. So before restoring make sure you back up your data by syncing with iTunes.

After the restore is complete, you can resync with iTunes to load the data back to your iPod Touch. Now see if your device shows a WiFi address (tap Settings > General > About and scroll down to WiFi Address). If none of the above settings and fixes work ,then you might want to consider getting your iPod touch repaired by Apple.

Sabtu, 24 Januari 2009

7 Cool Safari Tips & Tricks for iPod Touch and iPhone

Here are some very useful Tips and Tricks on how to use Safari browser on your iPod Touch and iPhone:

Tip 1:How to scroll back to the top of a long webpage

After flicking a page to get it to scroll, you can tap the page at any time to stop that movement. Don't forget, you can also manually drag the screen display to reset the part you're viewing. And when you’re scrolling through a long webpage in Safari - if you tap the bar at the top of your screen containing the time and battery, Safari will automatically scroll up to the top of the document/page and shows the address bar.
Show me more...

Tip 2:How to page down on a webpage

When not using a zoomed-in display, double-tap towards the bottom of the screen. The page will re-center around your tap. Make sure not to tap a link!

Tip 3:How to browse websites containing frames

Some webpages are organized into frames, where each frame displays a different web document. You can use Safari to browse and scroll through web pages containing frames by using two fingers simultaneously. On a computer you will be able to scroll through such frames using a scroll bar. On the iPhone and iPod touch these frames do not contain any scroll bars and each frame of such frameset will be expanded to fit its content. On the iPhone and iPod touch these frames do not contain any scroll bars and each frame of such frameset will be expanded to fit its content.

Example:
With MobileMe Mail on the web, you have a preview pane window. When you select your email in the Inbox while using Safari, you need to use the two finger flick or drag up or down solution to scroll through the body of that email message. When you use just one finger, you are scrolling through the web page so you won't be able to see the body of the email message.

Tip 4:How to Zoom in on a webpage

Sometimes it might be different to read the text on some webpages in the font size of the text is too small. So in the Safari browser window on any web page double tap to zoom in. You can also “pinch” (putting your thumb and index finger on the screen and pinching in and out) to zoom in on a particular paragraph and also zoom in on the Pictures. If the picture that your trying t ozoom in on is linked to a URL, this can prove a little tricky but it works great for non-linked images. Double-tap again to return to the unzoomed display.

Tip 5:How to type a lot of text

When typing a lot of text in Safari turn it to horizontal view. The keyboard will be bigger and you can get a better grip of the Touch while typing with two thumbs.

Tip 6: How to check website URLs

When in Safari, holding your fingertip down on a link instead of tapping it produces an information bubble that displays the underlying URL. The same thing happens in Mail when you hold a link, which makes this tip much more useful. Now when those “account update” e-mails appear, you can press and hold on the link to find out if you’re really going to be taken to the site the e-mail claims.

Tip 7:How to open link in a new browser window

A quick way to open a link in a new window in Safari is to open a new page, tap the bookmarks icon, tap the history folder and direct yourself to the last page you were just on and open the link from there.

Do you know of any other Safari navigation tricks? Please leave a comment.

Rabu, 07 Januari 2009

How to restore when wrong passcode disables your iPod Touch or iPhone

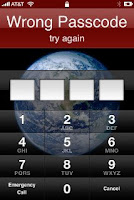
As you know iPhone and iPod touch allow you to set a passcode to be entered when powered on or when the wake button is pressed. And when you enter the wrong passcode you'll see a screen that says "Wrong Passcode, try again." If you enter the wrong passcode too many times, you'll see a message that says "iPod is disabled" and to try again late. The screen on the iPhone will read as "iPhone is disabled."
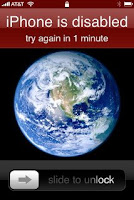
If you repeatedly enter the wrong passcode, iPhone or iPod touch will be disabled for longer intervals, before you can try again. After too many unsuccessful attempts, you won't be able to try again until you connect to the computer you normally sync with. Show me more...

Note that starting with iPhone 2.1 software, there is a setting to cause the device to erase itself after 10 consecutive incorrect password attempts. This setting is off by default. It can be turned on by tapping Settings > General > Passcode Lock after you enter a correct passcode.

If you cannot remember the passcode, you will need to restore your device on the computer that was used to originally sync the iPhone or iPod touch so that you can reset your passcode and resync the data from the device (or restore from a backup).

If you restore on a different computer that was never synced to the iPhone or iPod touch, you will be able to unlock the device for use and remove the passcode but your data will not be present.

Restoring your iPhone or iPod touch

Restoring your device will erase all data from your iPhone or iPod touch, including songs, videos, contacts, photos, calendar information, and any other data. All iPhone or iPod touch settings are restored to their factory condition.

Whenever you restore your iPhone or iPod touch, Apple highly recommends that you perform a sync prior to restoring in order to back up any changes since your last sync. If you have movie rentals on the device that you haven't finished watching, restoring using iTunes will delete the movie rental and will not be recoverable.

Use the following steps to restore your iPhone or iPod touch:
  1. Make sure you have the latest version of iTunes installed and running before attempting to update.
  2. Connect your iPhone or iPod touch to your computer.
  3. Select your iPhone or iPod touch when it appears in iTunes under Devices.
  4. Select the Summary tab.
  5. Select the Restore option.
  6. When prompted to back up your iPhone or iPod touch's settings before restoring, select the Back Up option. If have just backed up the device, it is not necessary to create another.
  7. Select the Restore option when iTunes prompts you (As long as you've backed up your device, you should not have to worry about restoring your phone).
  8. Once the restore process has completed the iPhone or iPod touch restarts and displays the Apple logo while starting up. NOTE:For the iPhone only, after a restore, the iPhone displays the "Connect to Activate" screen. During this period you must continue to keep your device connected to complete activation and make sure you are connected to the internet.
  9. The final step is to restore your iPhone or iPod touch from a previous backup. So on the setup screen select the back up you want for your iPhone or iPod touch and select the Continue button in order to complete your device's restoration.

Kamis, 20 September 2007

iPod Touch home button double-click feature

One of the good feature of the iPod Touch that the iPhone lacks is the ability to double-click the Home or the tactile button to bring the iPod controls.

Pressing the only tactile button on the player twice makes music controls appear over whatever screen mode you happen to be in—Safari, YouTube, or whatever.

Even if the player is locked, double-clicking will bring up a set of music controls that features track information, play/pause, forward and backward within a playlist or album, a Music button to take you directly to the Now Playing screen, and a Close button to escape.

This function works even if the screen has timed out and gone black, and it's a great quick way to skip that song you hate or pump up the volume on the one you love.

Senin, 17 September 2007

iPod touch features multiple keyboards with multi-language support

The iPod Touch keyboard functionality is far more robust & superior than the iPhone’s keyboard.

iPod touch provides keyboards in 14 different languages, and supports the following
keyboard formats:
- QWERTY
- QWERTZ
- AZERTY
- QZERTY
- Japanese IME

In addition, the iPod touch provides the ability to make two or more keyboards available simultaneously. If more than one keyboard is turned on you can tap a special icon to switch keyboards while you’re typing. Apple says “When you tap the symbol, the name of the newly active keyboard appears briefly.”

Another interesting feature is that the iPod touch’s keyboard allows you to quickly type a period by double-tapping the spacebar.

iPod touch also has keyboard dictionaries for English (both U.S. and U.K.), French, and German. If you’re typing on a keyboard set to one of those languages, iPod touch uses the corresponding dictionary to suggest a correction when it appears that you’re
misspelling a word, or to predict the word you’re currently typing. The suggested correction or prediction appears just above or below the word you’re typing.

 
Design by Free WordPress Themes | Bloggerized by Lasantha - Premium Blogger Themes | Lady Gaga, Salman Khan