These are instructions on how to jailbreak your 2G iPod Touch using a Mac. This is a detailed tutorial that involves using the command line. The 2G iPod Touch jailbreak will be included in future versions of PwnageTool and an easier tutorial will be released then.
Step One
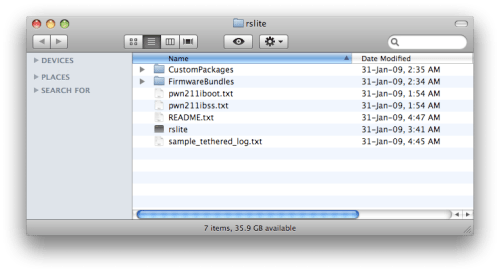
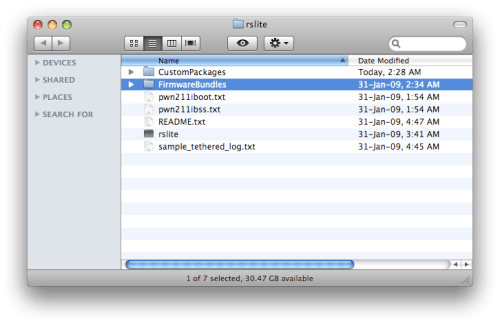
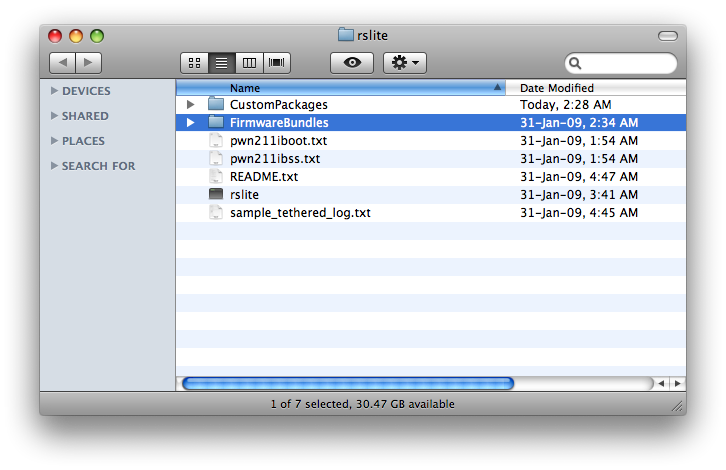
Download redsn0w (rslite101.zip) to your desktop and double click to extract the rslite folder.
Step Two
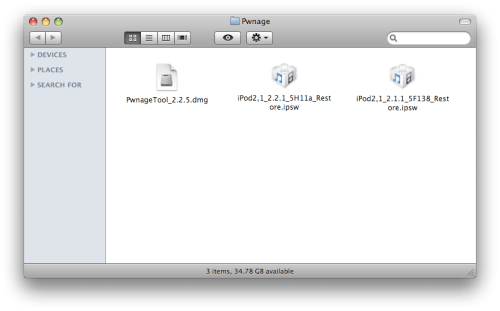
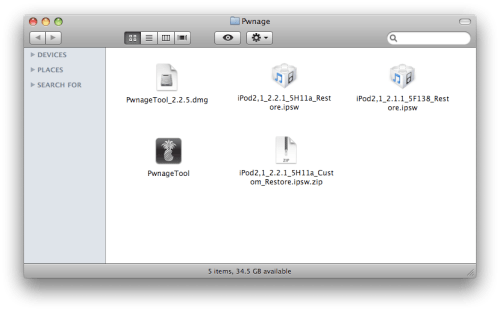
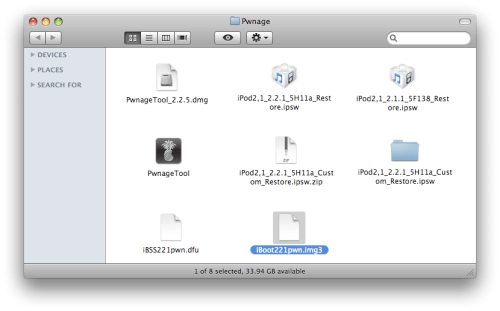
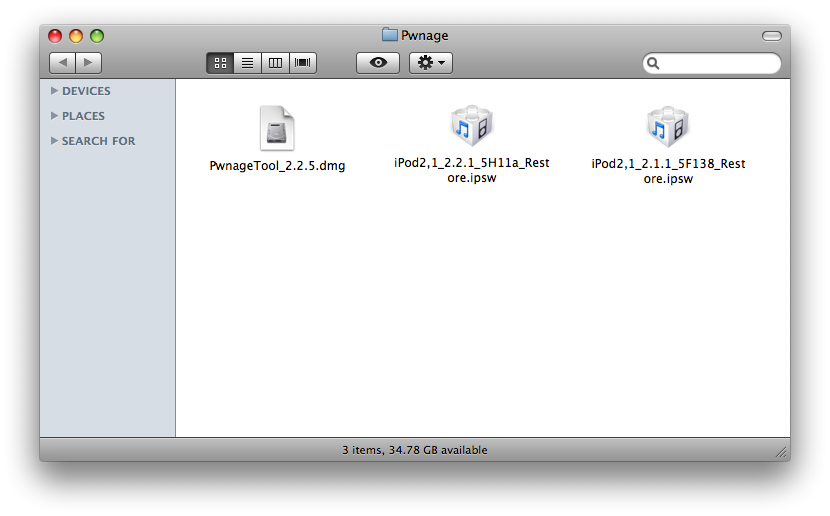
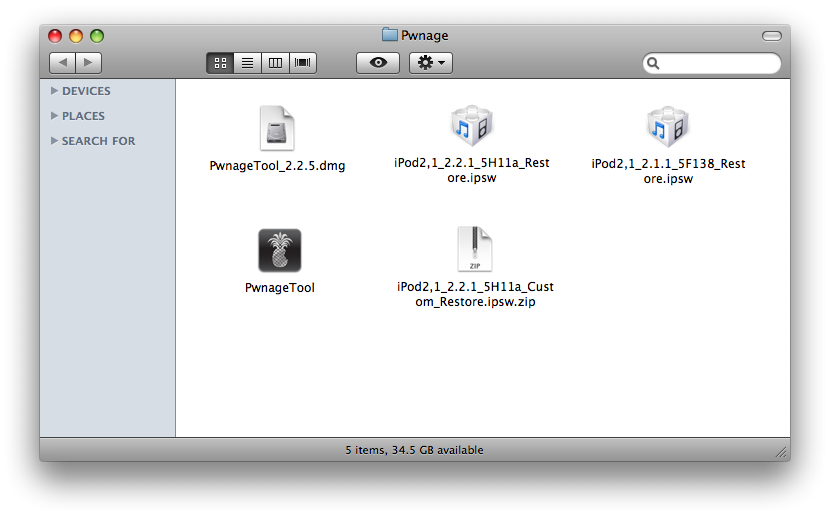
Create a folder on your desktop with the following files:
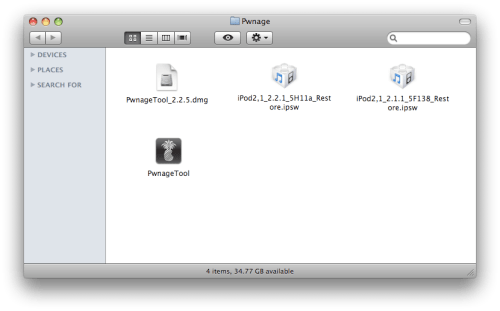
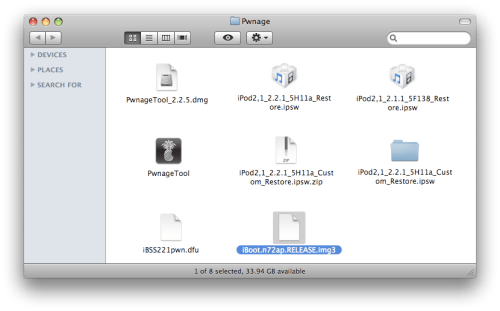
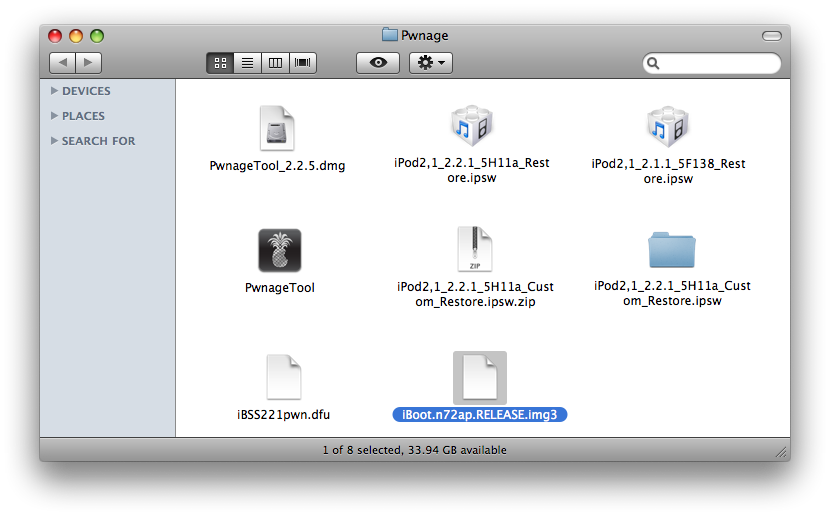
PwnageTool 2.2.5
iPod2,1_2.2.1_5H11a_Restore.ipsw
iPod2,1_2.1.1_5F138_Restore.ipsw
Step Three
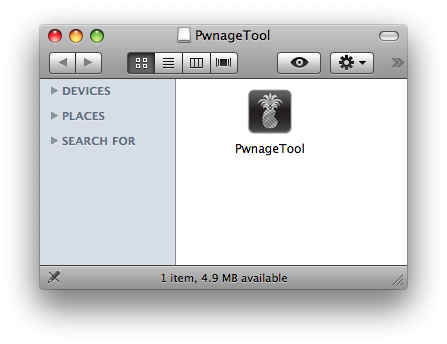
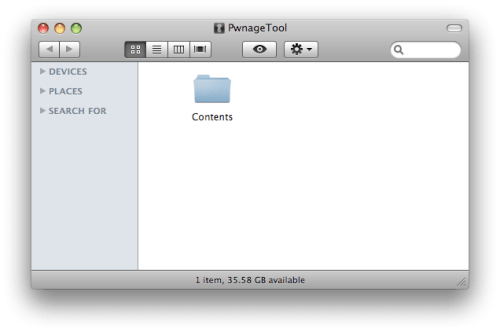
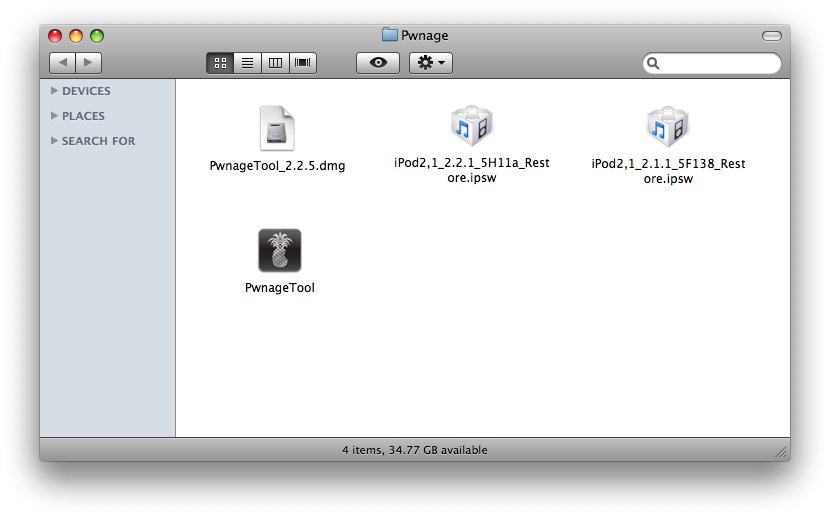
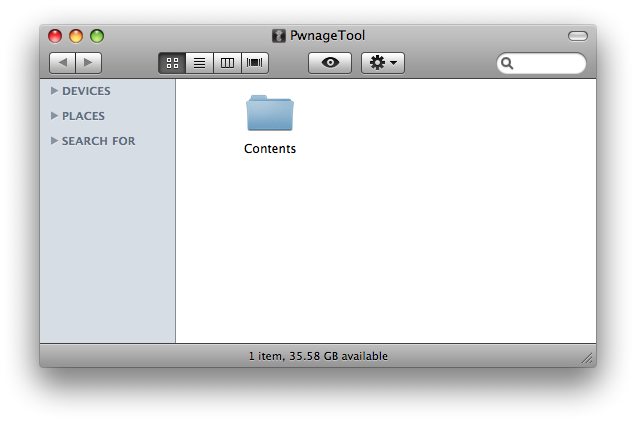
Double click to mount PwnageTool 2.2.5 then drag the PwnageTool icon into the Pwnage folder.

Step Four
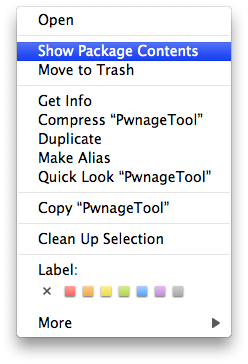
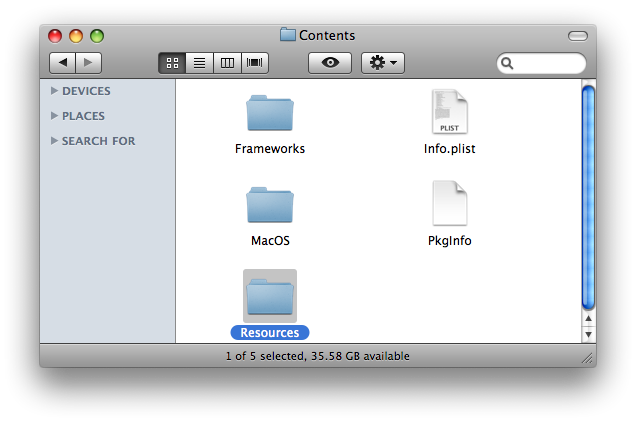
Hold down the Control button then click the PwnageTool icon in the Pwnage folder. Click Show Package Contents from the menu that appears.
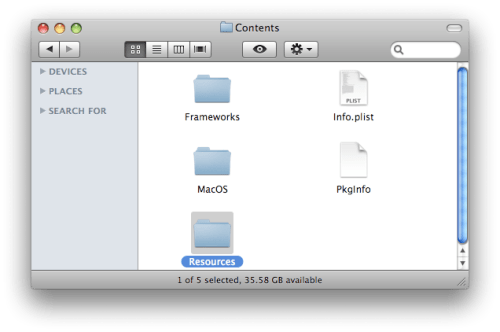
Double click the Contents folder to open it
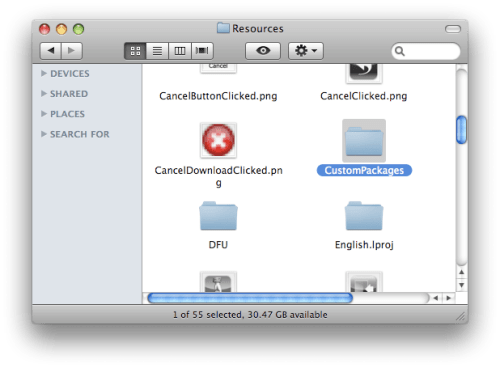
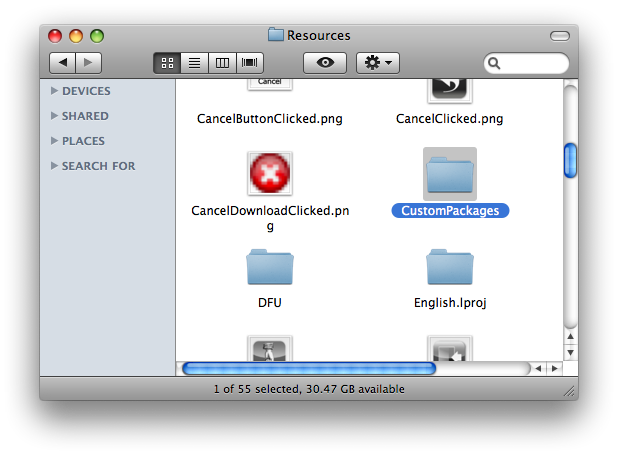
Double click the Resources folder to open it
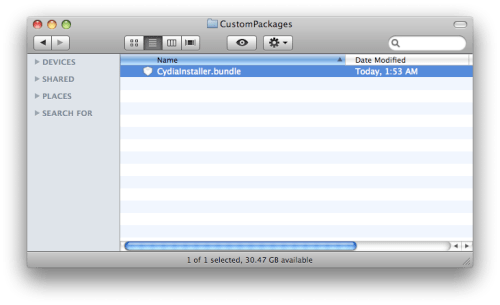
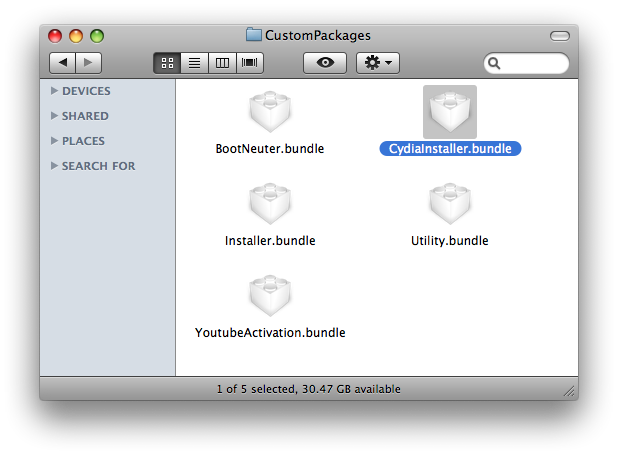
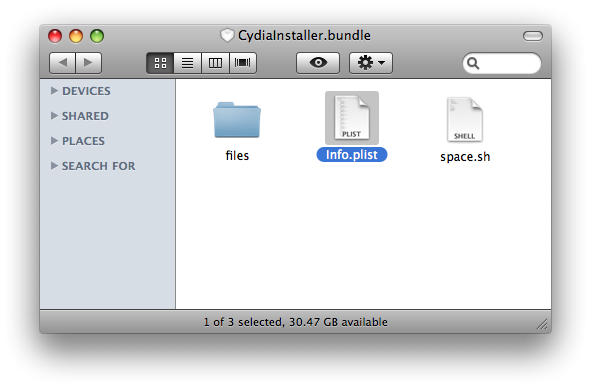
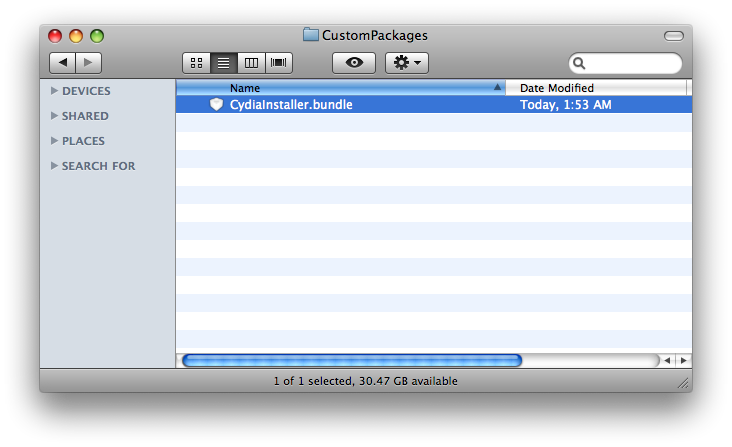
Double click the CustomPackages folder to open it
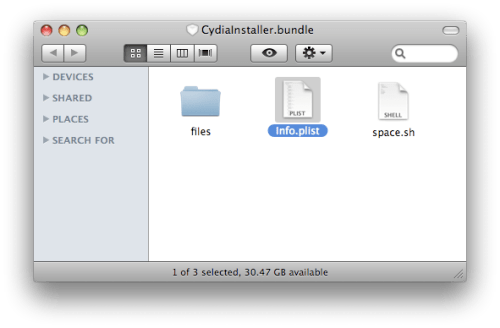
Hold down Control and click the CydiaInstaller.bundle file.
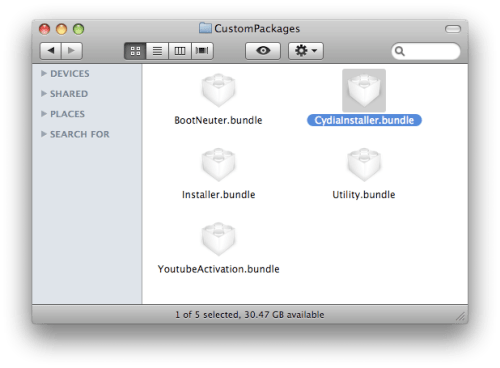
Select Show Package Contents from the menu that appears.
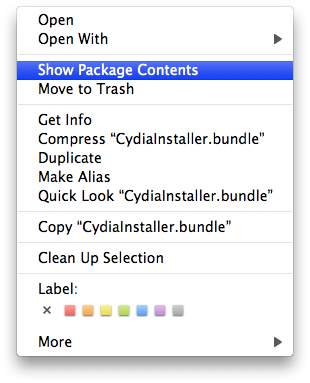
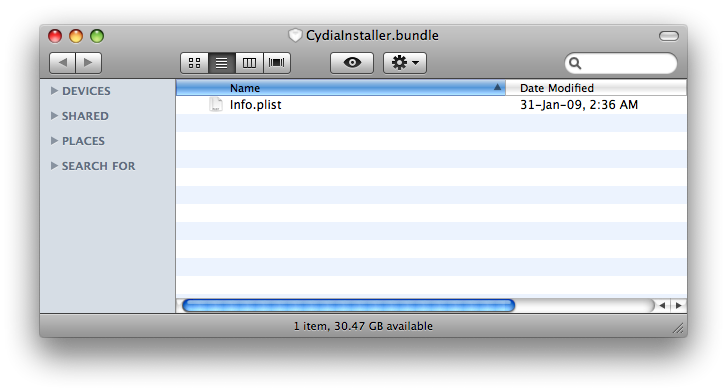
Notice the file Info.plist.

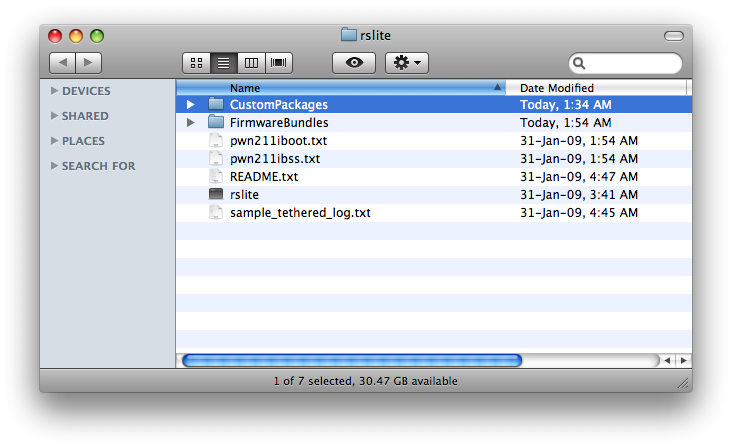
Keeping this window open double click the rslite folder on your desktop to open a second window then double click the CustomPackages folder inside it.

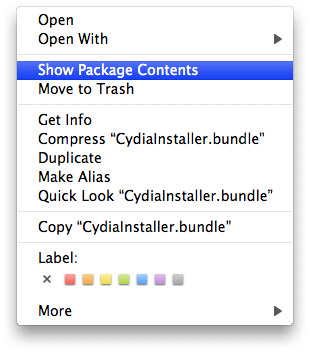
Hold down Control and click the CydiaInstaller.bundle file.
Select Show Package Contents from the menu that appears.
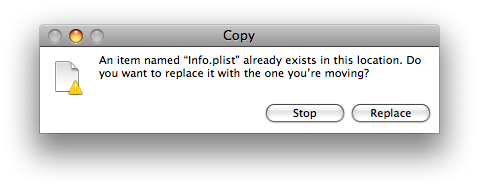
Drag the Info.plist file from the second window into the first (replacing the file that was there).
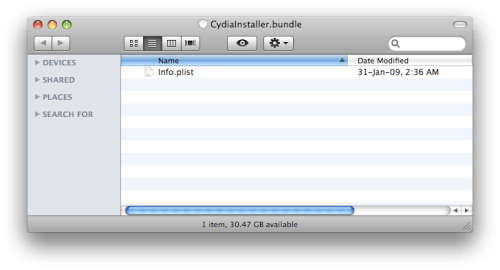
When asked to confirm click the Replace button.
Step Five
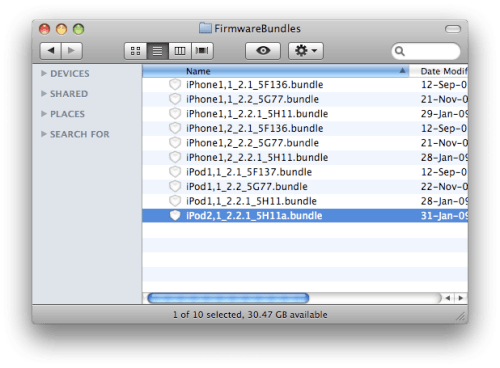
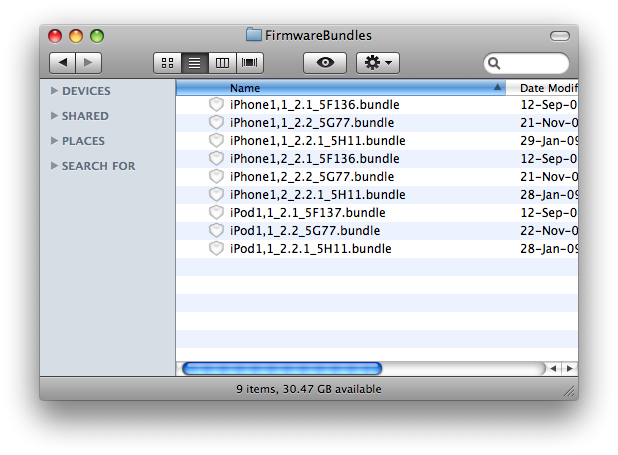
Press the Back button on the first CustomPackages window then double click the FirmwareBundles folder.
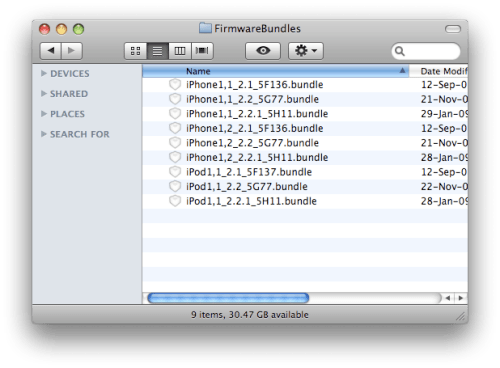
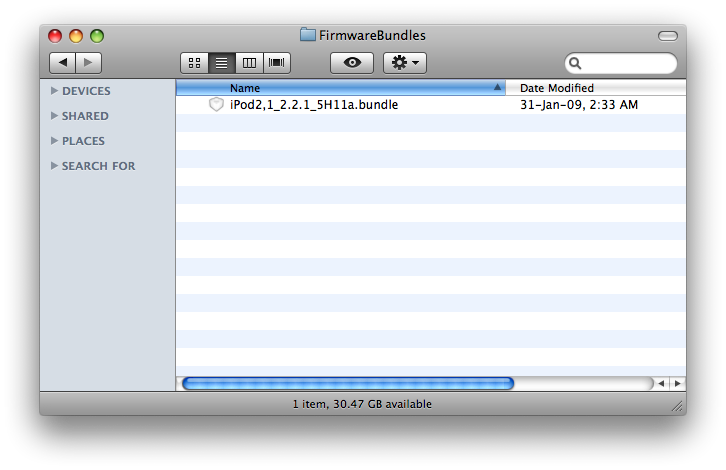
Press the Back button on the second CustomPackages window (within rslite) then double click the FirmwareBundels folder.
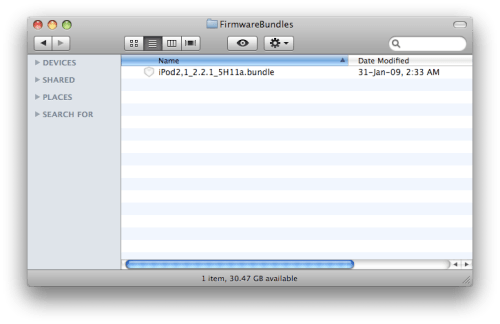
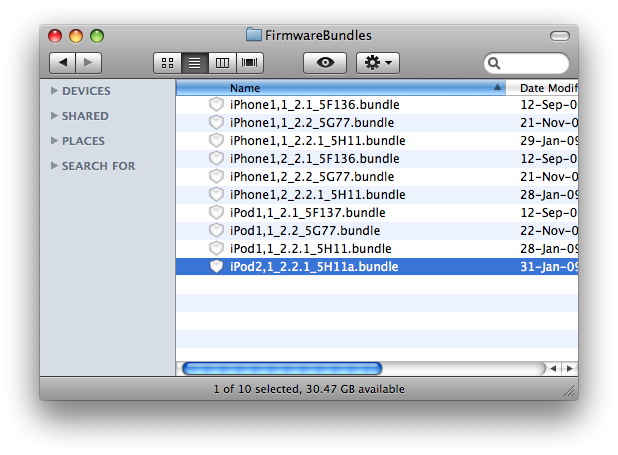
Drag the iPod2,1_2.2.1_5H11a.bundle from the second window into the first.
Step Six
Then from the Pwnage folder double click to launch the PwnageTool application.

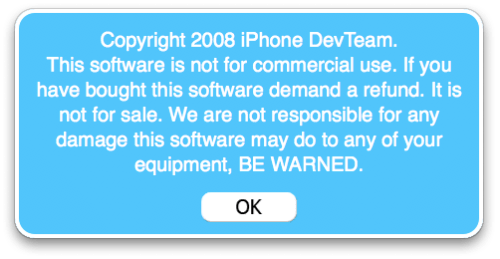
Click Ok if presented with a warning.
Step Seven
Click to select Expert Mode from the top menu bar

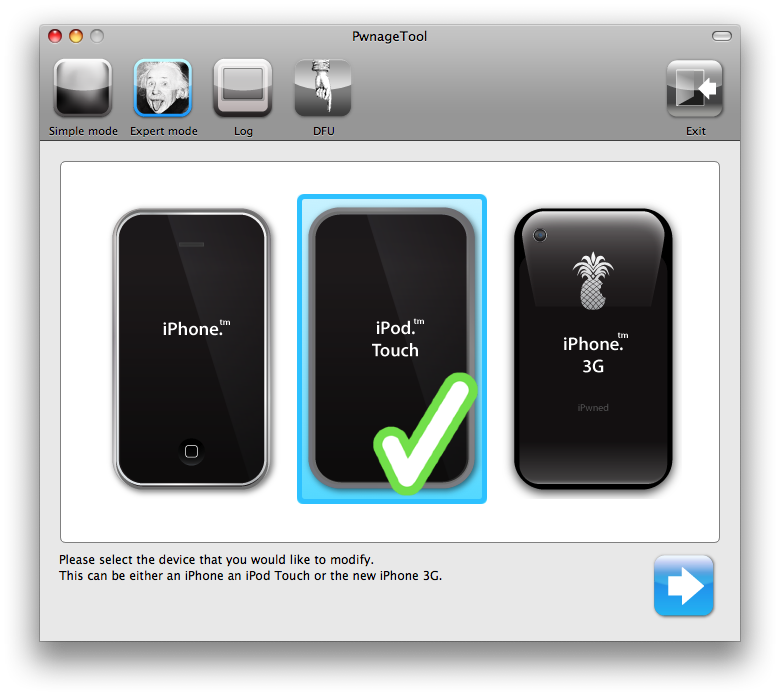
Step Eight
Click to select the iPod. A check-mark will appear over the image of the iPod.
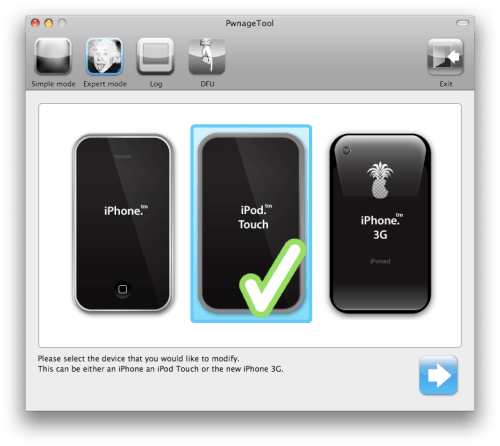
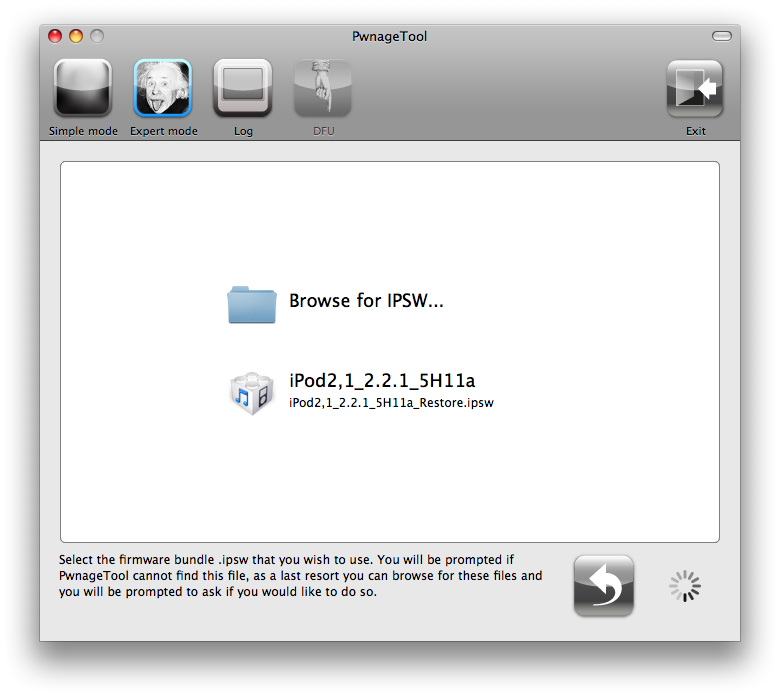
Step Nine
Click the blue arrow button to continue. You will be brought to the "Browse for IPSW" page. On my laptop, it automatically found the IPSW. If PwnageTool doesn't automatically find the ipsw file you can click Browse for IPSW....

Click to select the found IPSW file, a checkmark will appear next to it. Then click the blue arrow button to continue.

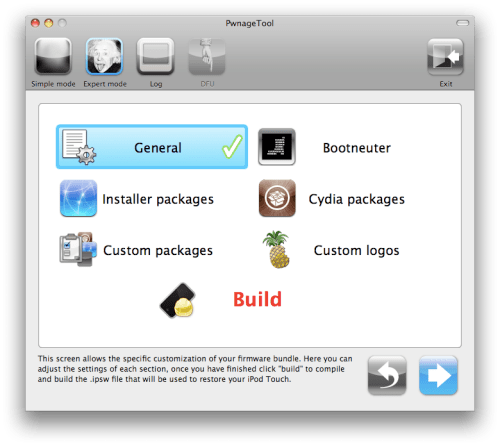
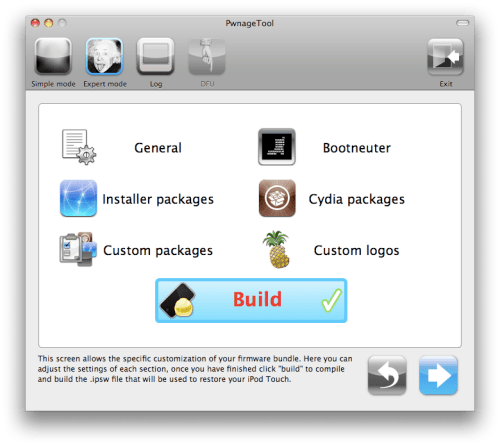
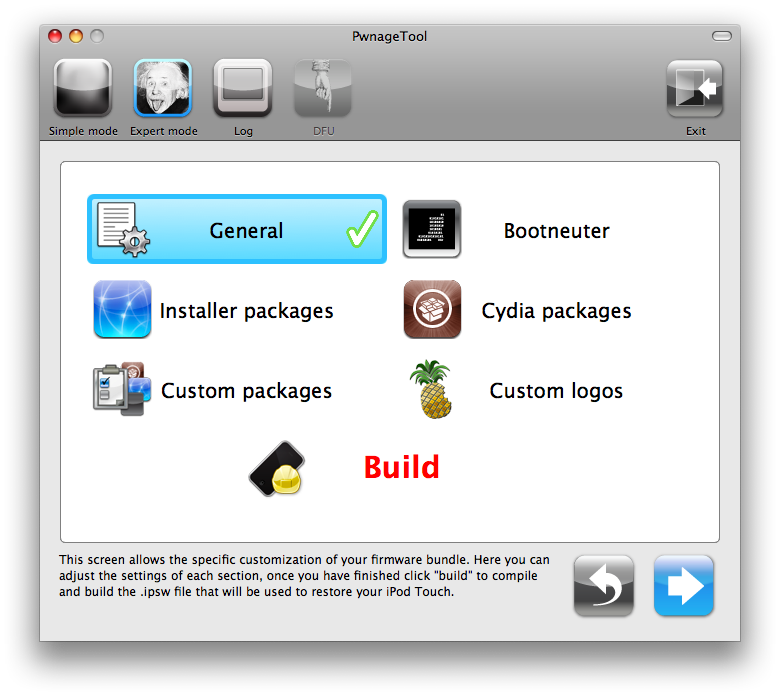
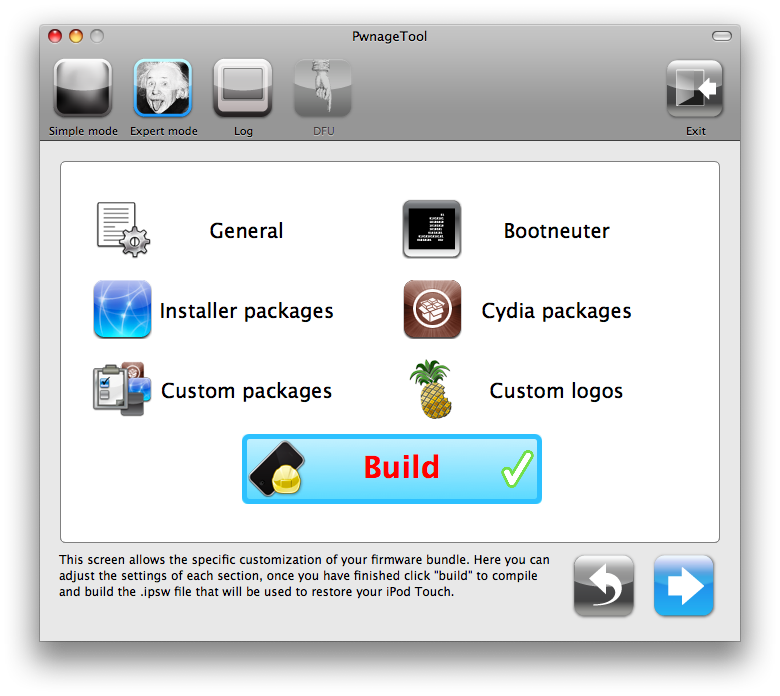
Step Ten
You will then be brought to a menu with 7 choices. Click to select General then click the blue arrow button.
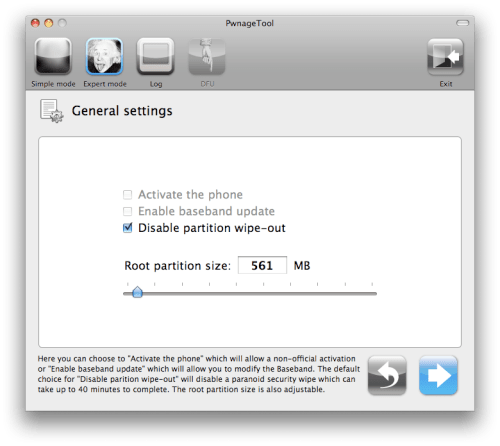
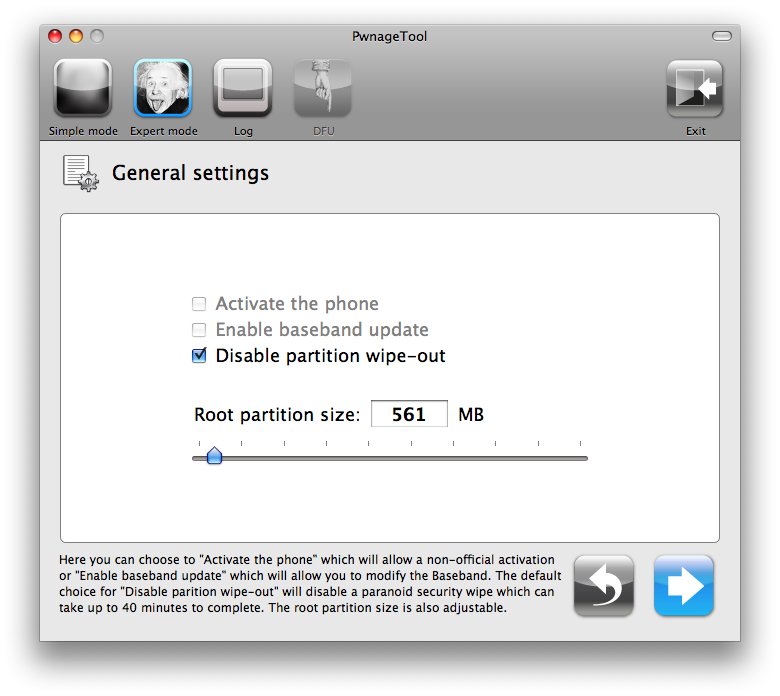
The General settings allows you to decide the partition size. Click the blue arrow button.
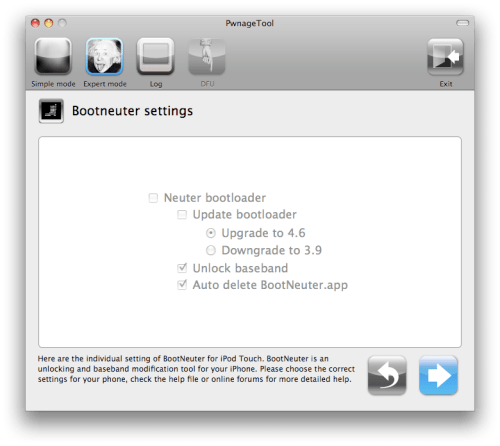
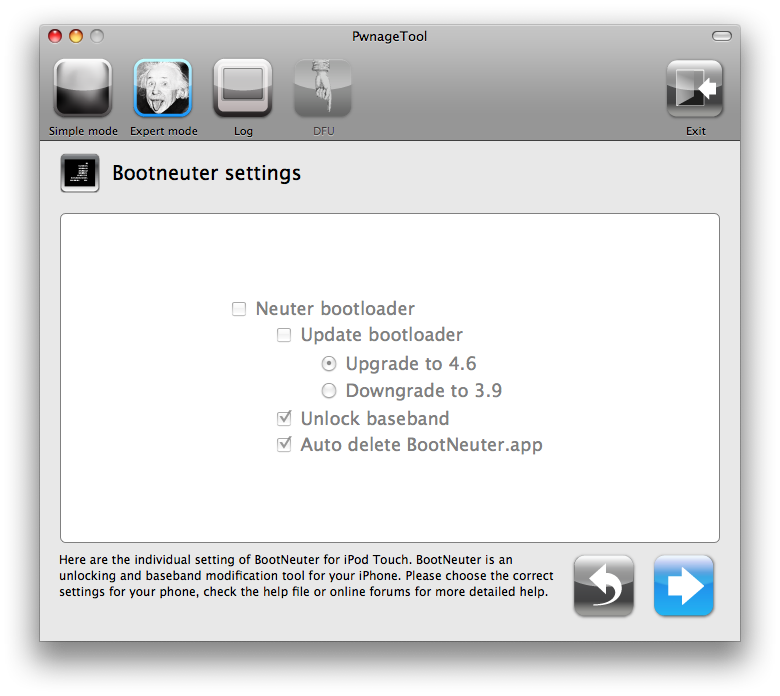
The Bootneuter settings are greyed out for the iPod. Click the blue arrow button.
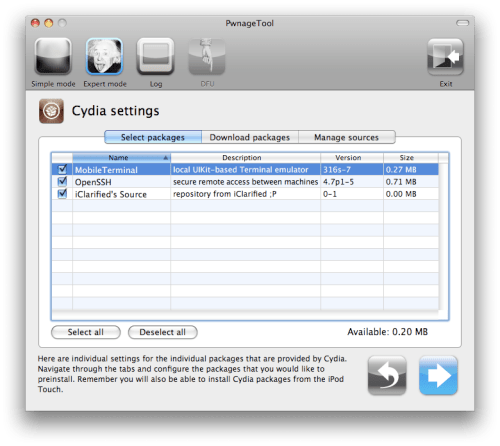
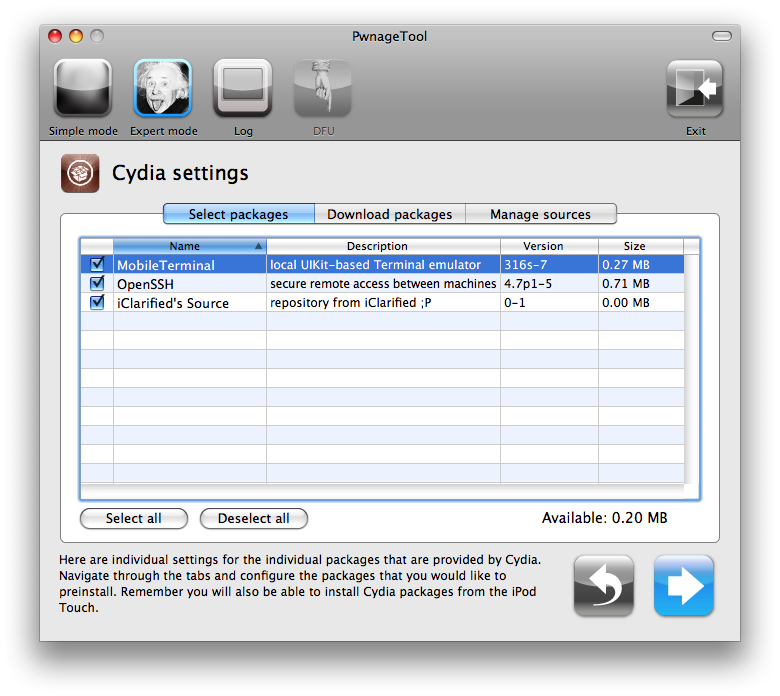
The Cydia settings menu allows you to create custom packages so you do not have to manually install the necessary them later.

Click to select the Download packages tab. Then click the Refresh button to display all the available packages. Double clicking the package you want will download it and make it available in the Select Packages tab. Checkmark the ones you want then Click the blue arrow button.
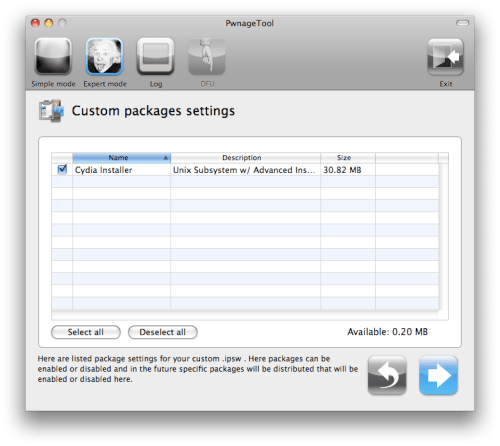
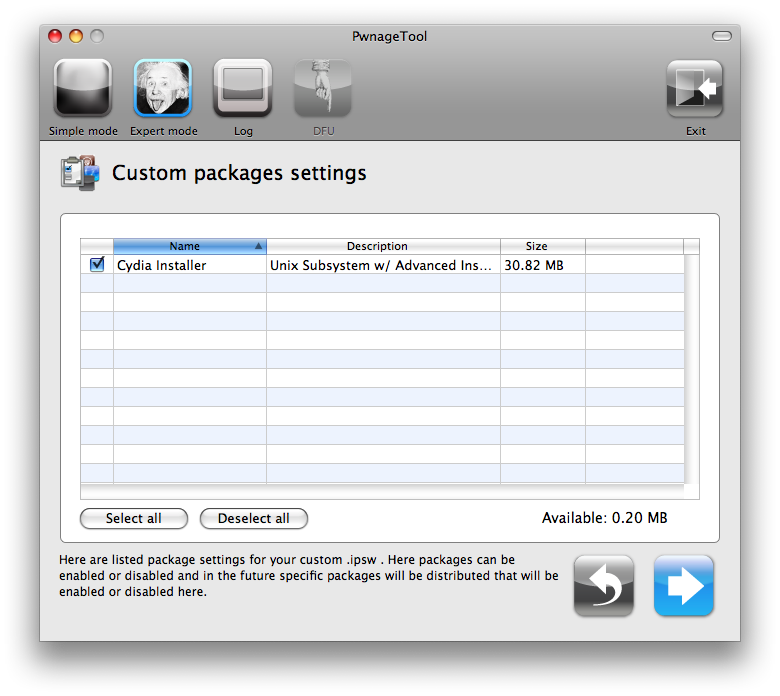
The Custom Packages Settings menu displays listed package settings for your custom IPSW. For now leave these settings as is. Click the blue arrow button to continue.
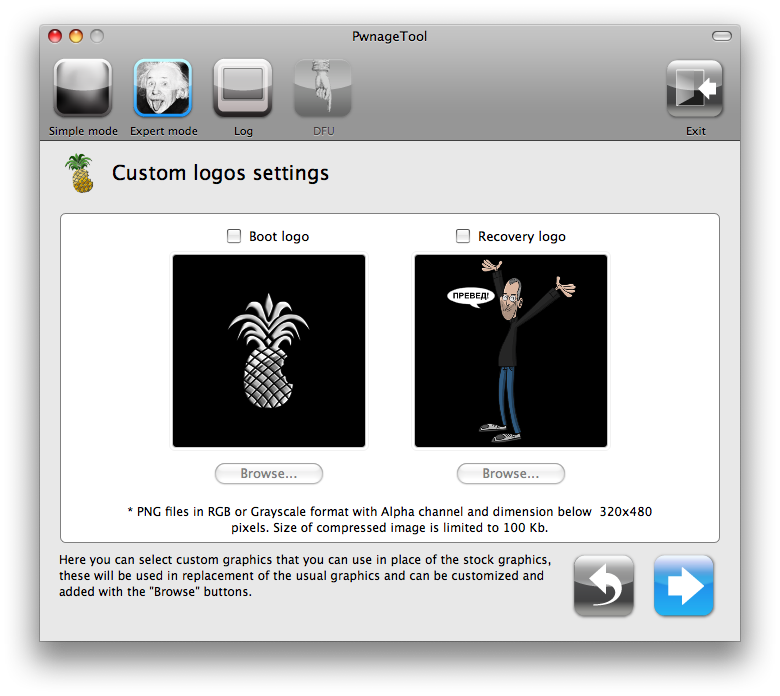
The Custom Logos Settings menu allows you to add your own images as boot logos. Currently this feature is not available for the iPod touch jailbreak. Please deselect both checkboxes.

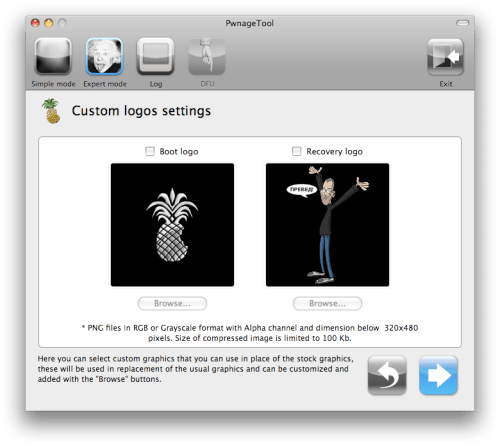
Click the blue arrow button to continue.
Step Eleven
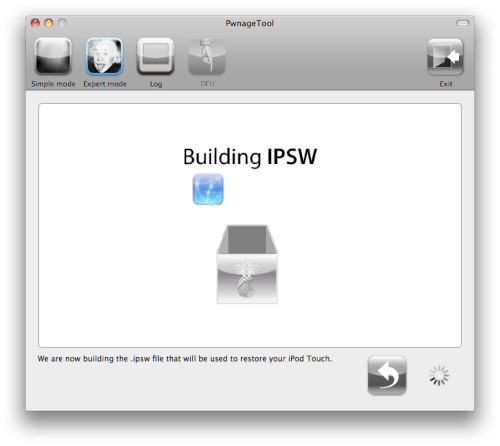
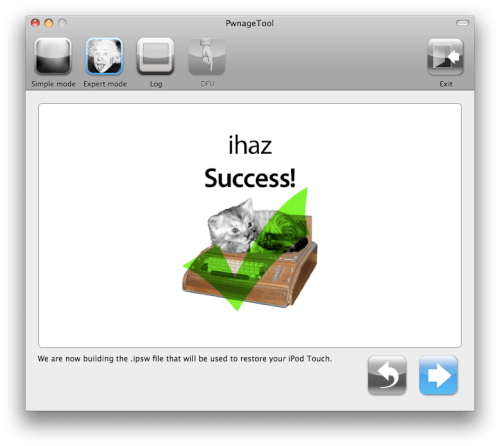
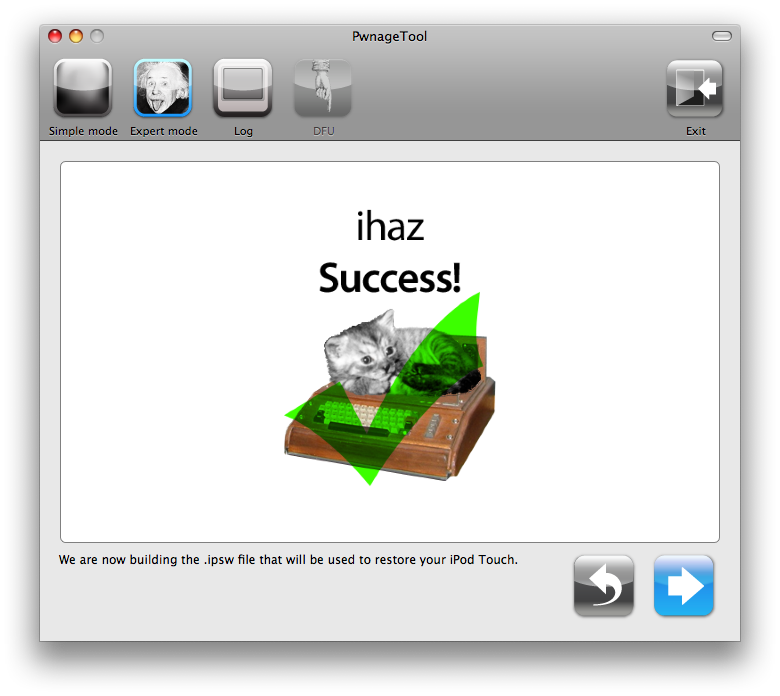
You are now ready to begin the pwnage process! Click the Build button to select it then click the Blue arrow button to begin.
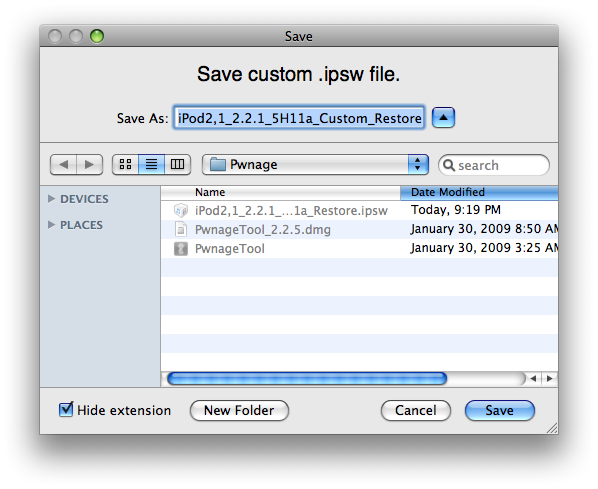
Step Twelve
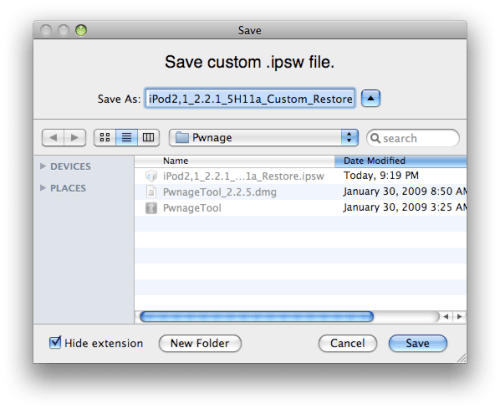
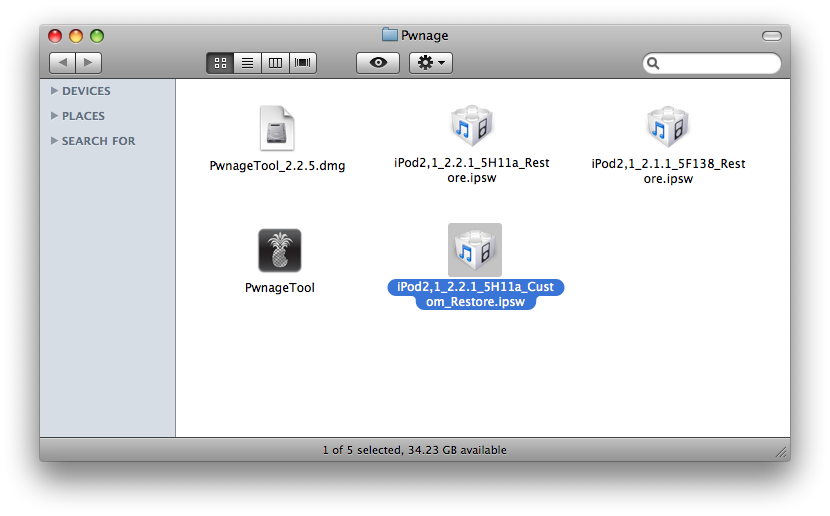
You will be asked to save your custom .ipsw file. Save it to your Pwnage folder you created on your Desktop.
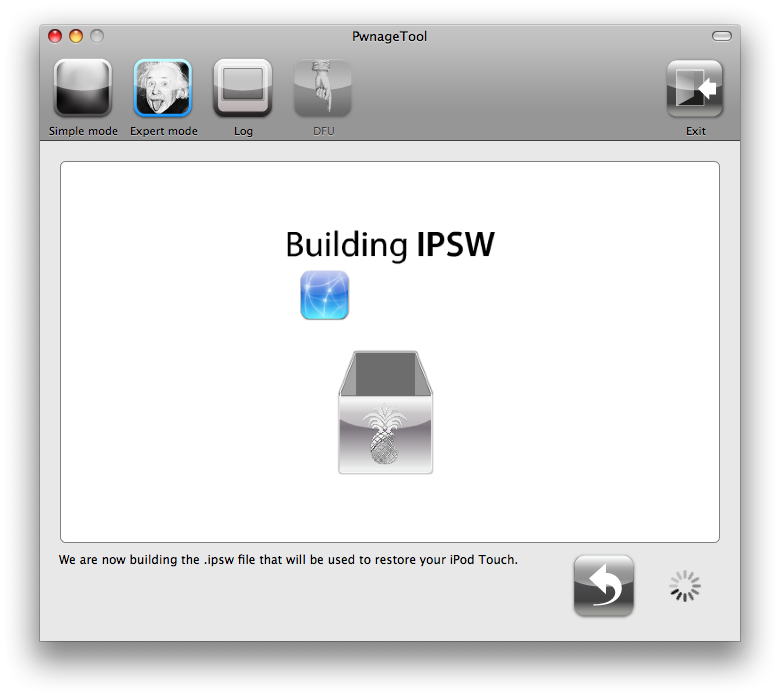
Your IPSW is not being built. Please allow up to 10 minutes.
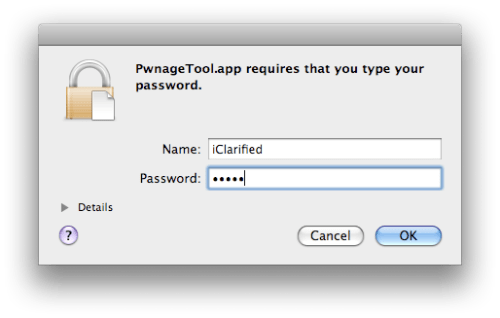
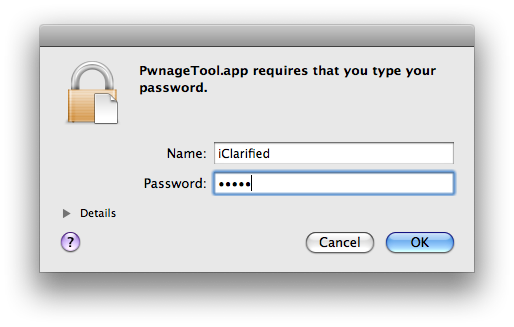
You will be asked to enter your administrator password. Do this then click the OK button.
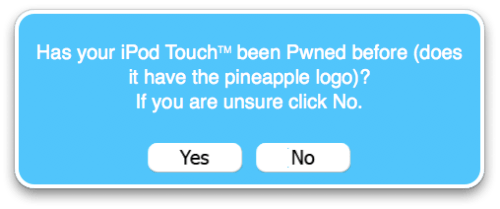
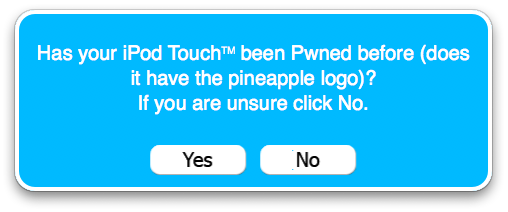
When prompted if your iPhone has been Pwned before, click Yes.
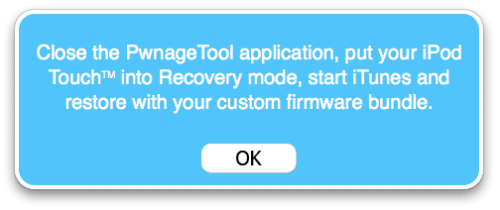
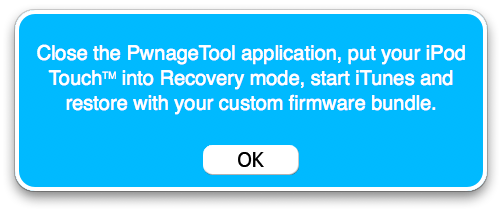
Click Ok when the next popup window appears.
Click the Exit button at the top right to close PwnageTool.
Step Thirteen
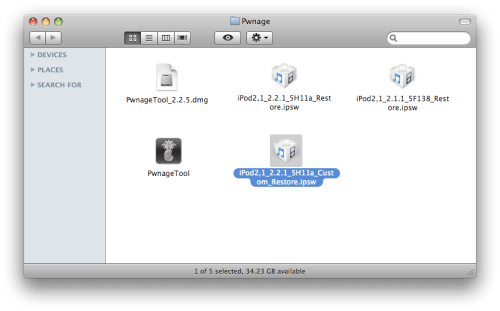
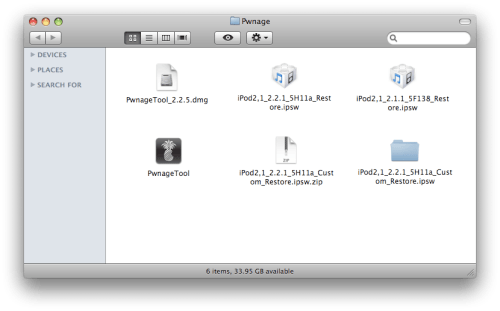
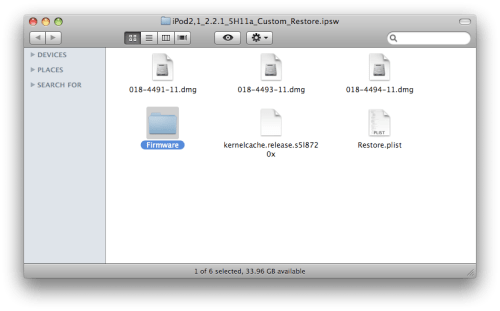
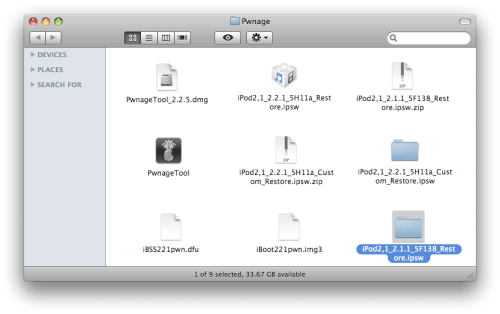
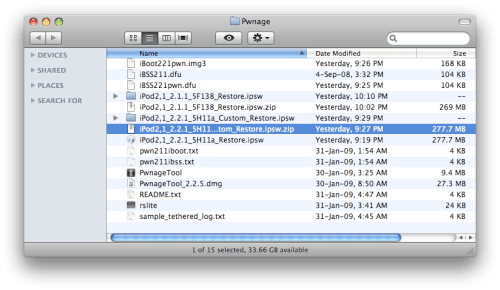
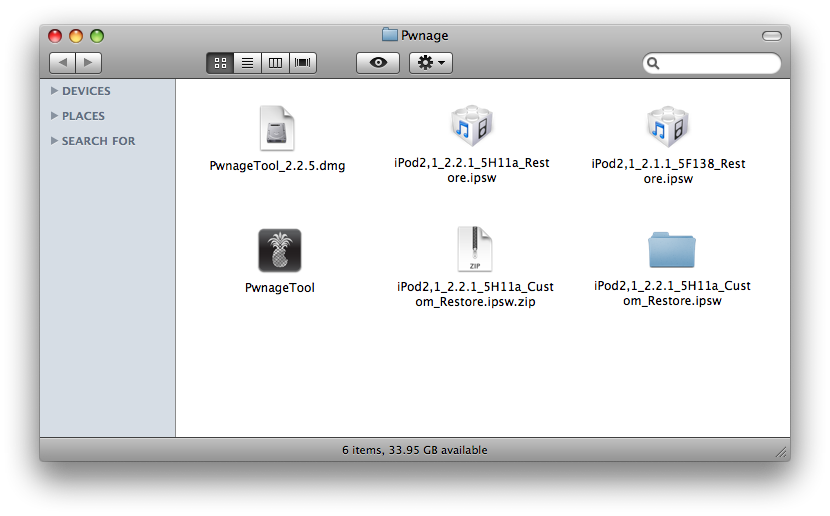
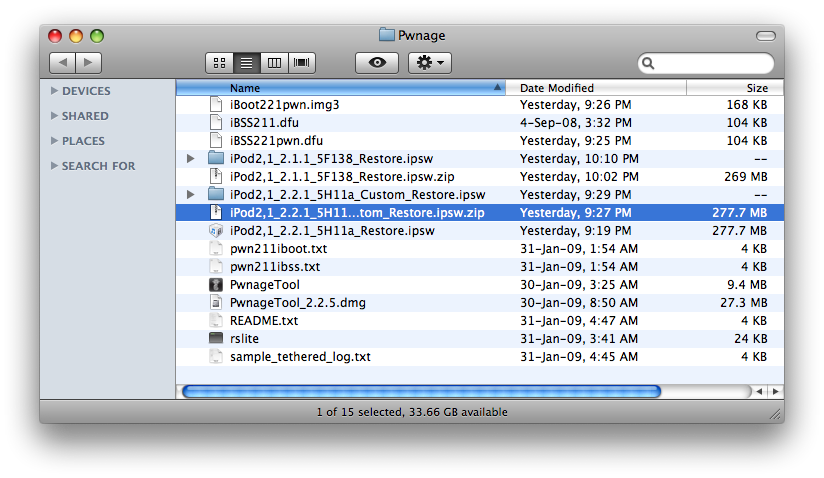
Notice a new iPod2,1_2.2.1_5H11a_Custom_Restore.ipsw is created in your Pwnage folder.

Select the iPod2,1_2.2.1_5H11a_Custom_Restore.ipsw then add a .zip to the end of the filename. You can rename files by pressing the Enter key with the file selected.
Double click the iPod2,1_2.2.1_5H11a_Custom_Restore.ipsw.zip file we just renamed to extract it.
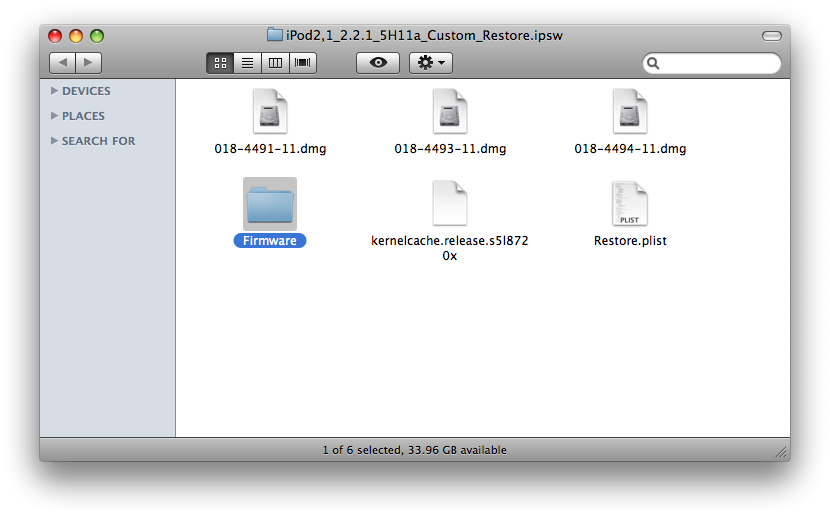
Double click the extracted iPod2,1_2.2.1_5H11a_Custom_Restore.ipsw folder to open it
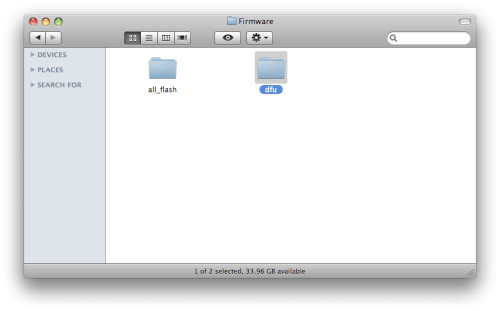
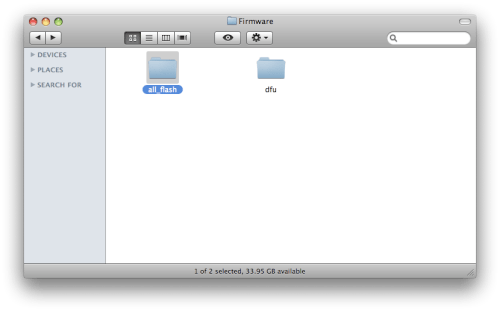
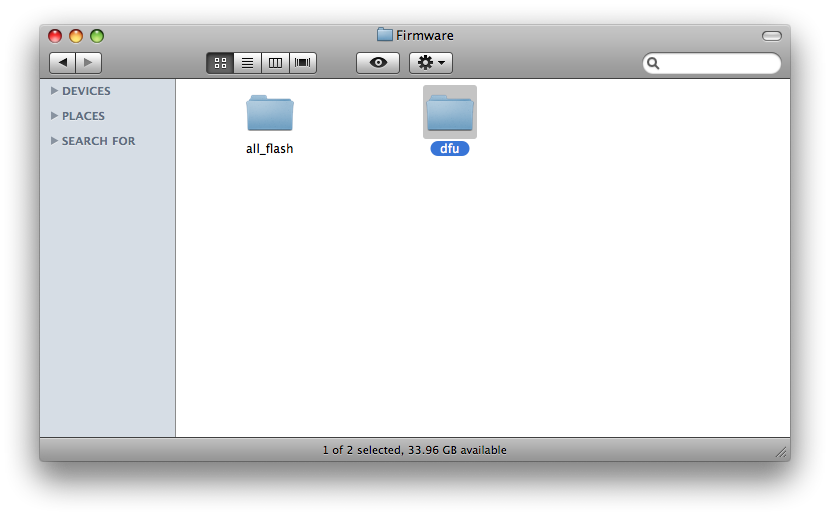
Double click the Firmware folder to open it

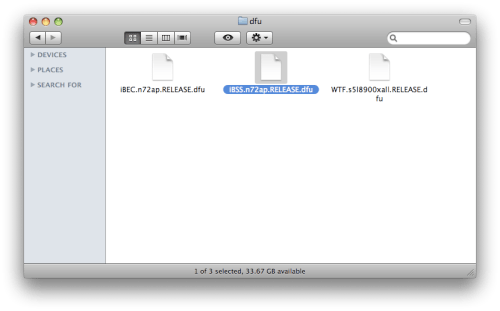
Double click the dfu folder to open it
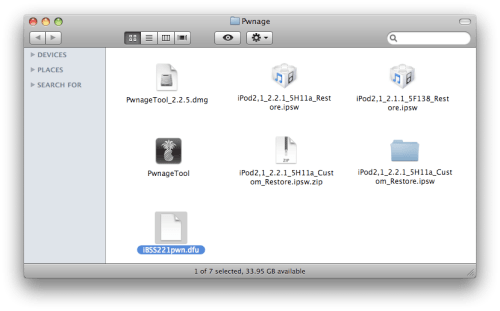
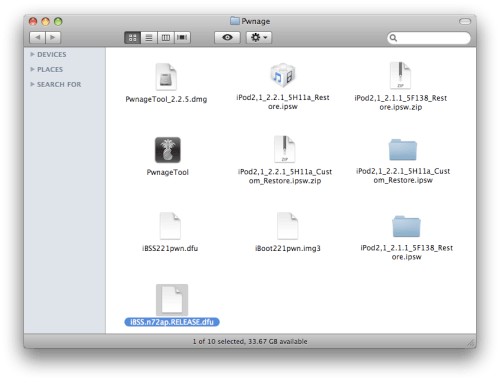
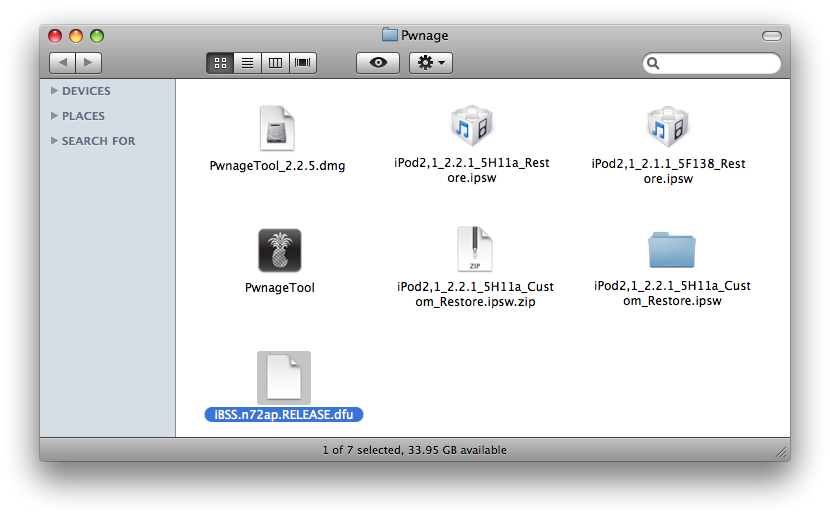
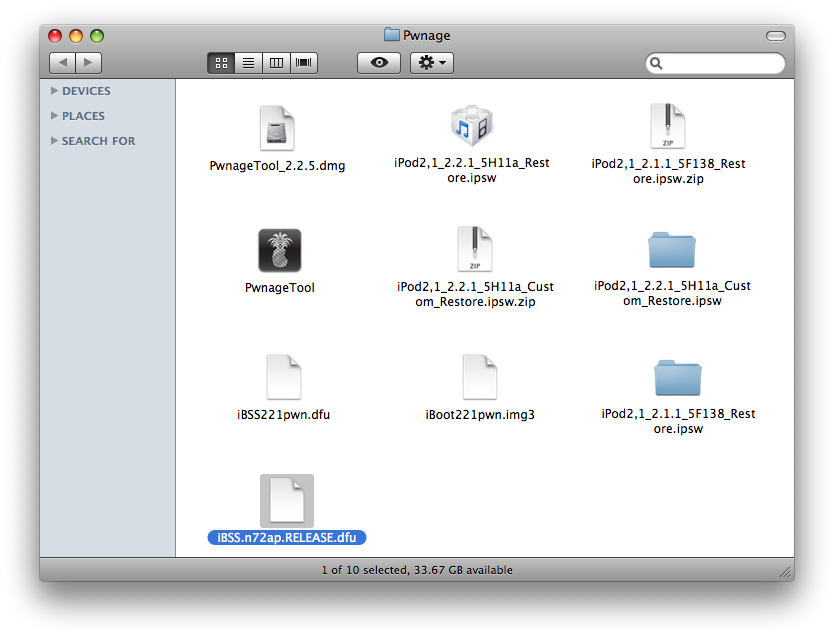
Select the iBSS.n72ap.RELEASE.dfu file and press Command+C to copy it to the clipboard.

Press the back button till you return to the Pwnage folder and press Command+V to paste the iBSS.n72ap.RELEASE.dfu into the folder.

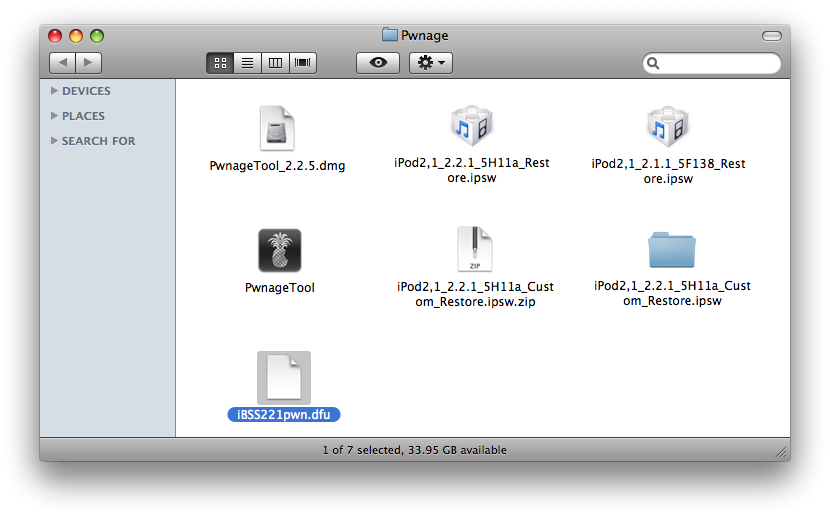
Select the file and press Enter to rename it to iBSS221pwn.dfu.
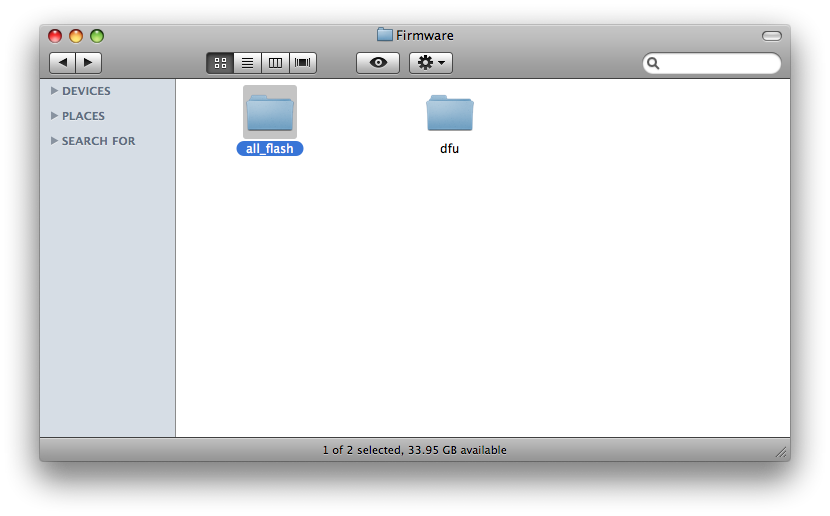
Double click the iPod2,1_2.2.1_5H11a_Custom_Restore.ipsw folder to open it again. Then double click the Firmware folder.
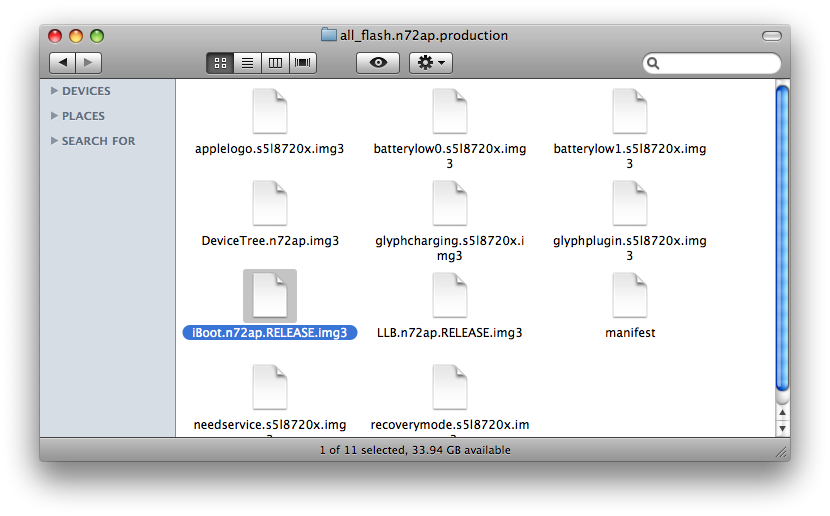
Double click the all_flash folder to open it
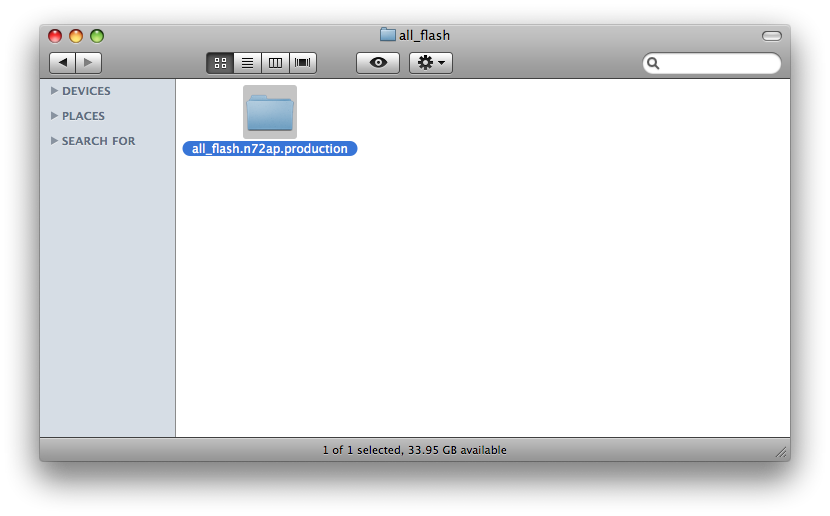
Double click the all_flash.n72ap.production folder.

Select the iBoot.n72ap.RELEASE.img3 file and press Command+C to copy it to the clipboard.
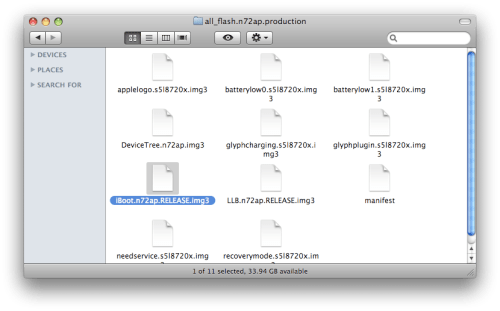
Press the back button till you return to the Pwnage folder and press Command+V to paste the iBoot.n72ap.RELEASE.img3 into the folder.
Select the file and press Enter to rename it to iBoot221pwn.img3.
Step Fourteen
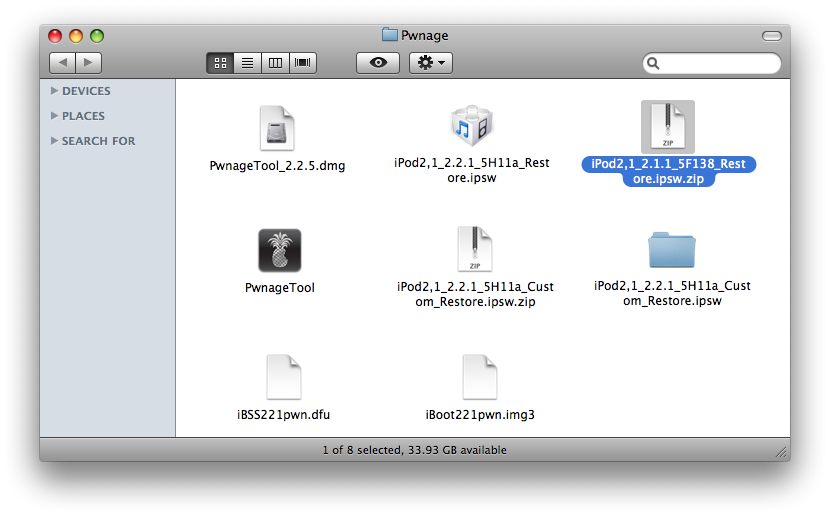
In the Pwnage folder select the iPod2,1_2.1.1_5F138_Restore.ipsw file and press Enter to rename it to iPod2,1_2.1.1_5F138_Restore.ipsw.zip.
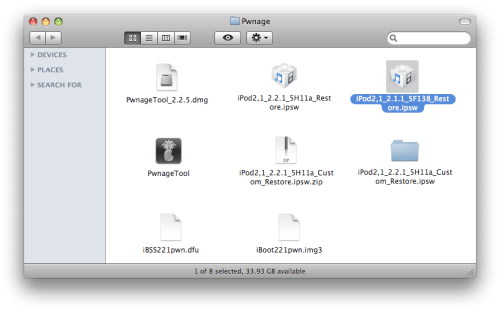
Double click the iPod2,1_2.1.1_5F138_Restore.ipsw.zip you just created to extract it.

Double click the newly extracted iPod2,1_2.1.1_5F138_Restore.ipsw folder to open it.
Double click the Firmware folder to open it

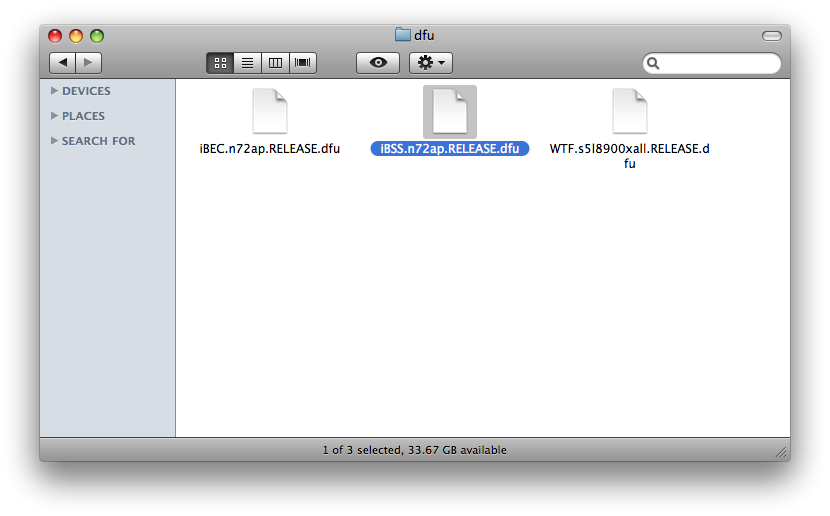
Double click the dfu folder to open it

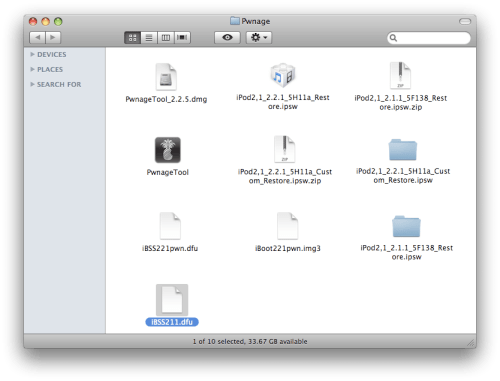
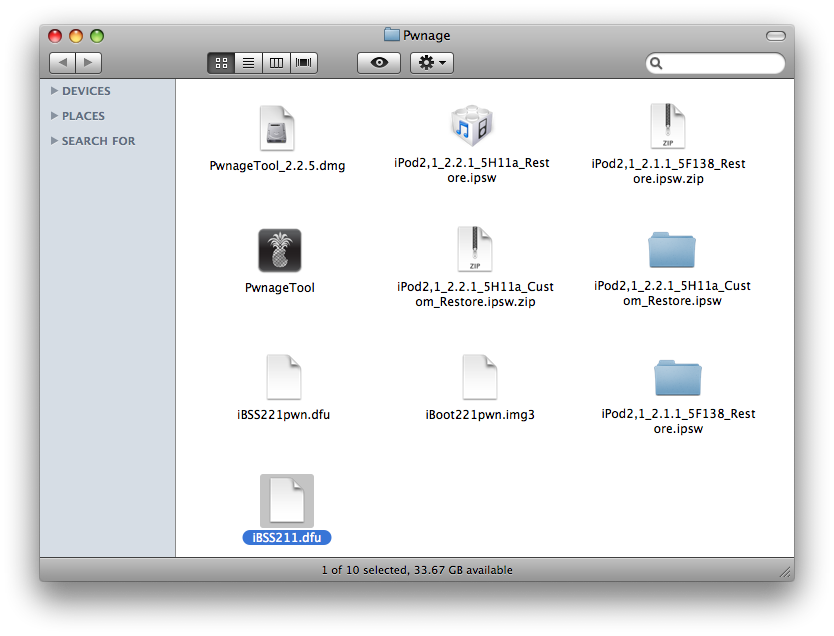
Select the iBSS.n72ap.RELEASE.dfu file and press Command+C to copy it to the clipboard.
Press the back button till you return to the Pwnage folder and press Command+V to paste the iBSS.n72ap.RELEASE.dfu into the folder.
Select the file and press Enter to rename it to iBSS211.dfu.
Step Fifteen
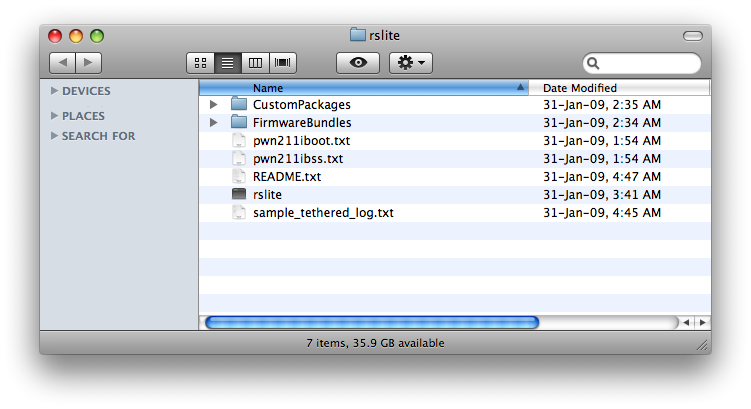
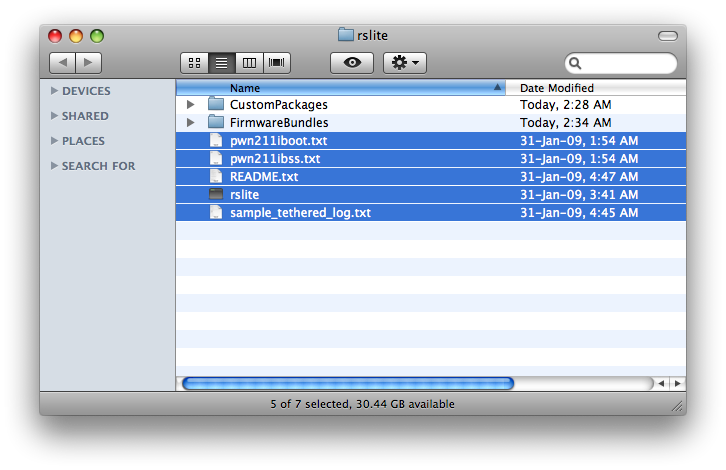
Open the rslite folder on your Desktop and select only the files (not the folders).
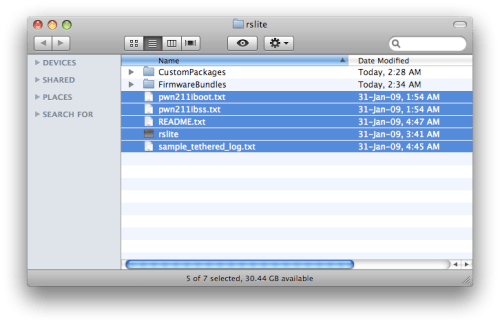
Drag(or copy) these files into the Pwnage folder you already have open.
Step Sixteen
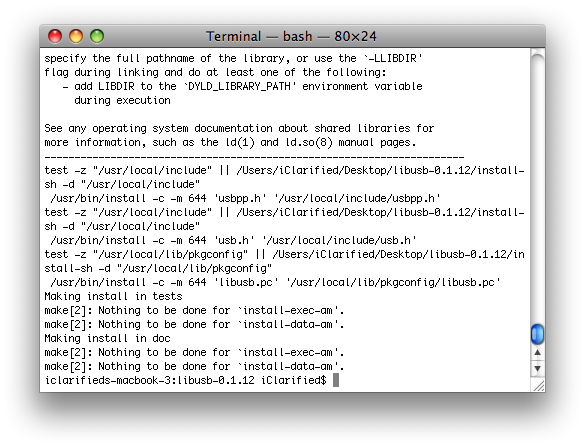
If you do not have libusb installed on your Mac you will need to install it now. Please skip this step if you have libusb. Note*: You will likely need XCode to install libusb. You can install it from here
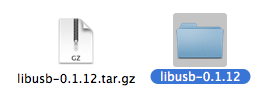
Download libusb (legacy) from here and place it on your desktop.
Double click the downloaded file (libusb-0.1.12.tar.gz) to extract it.
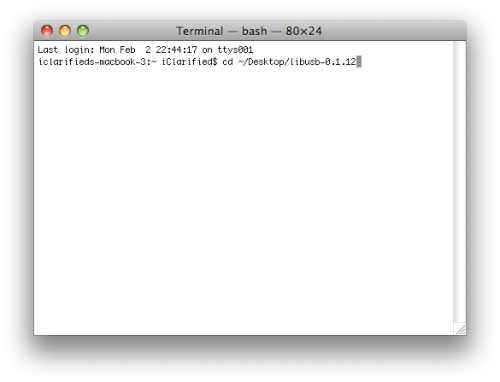
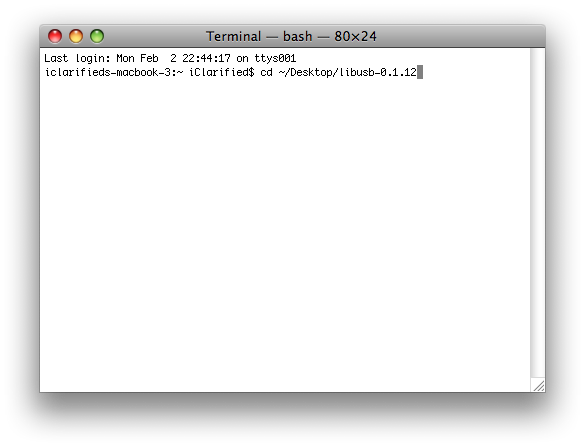
Launch the Terminal utility from Applications:Utilities.

Type cd ~/Desktop/libusb-0.1.12 into the Terminal window and press Enter.
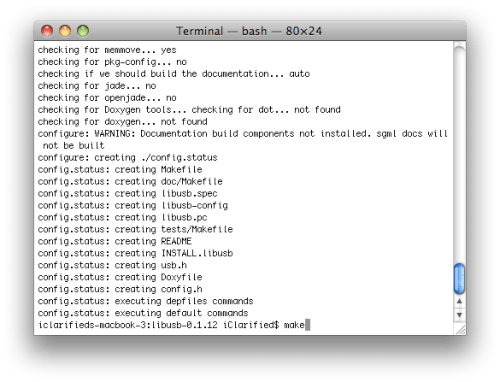
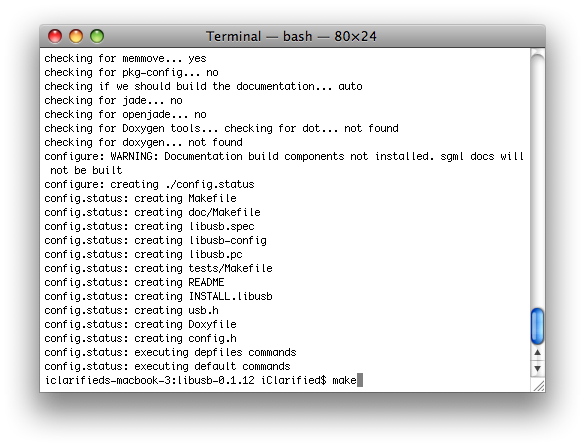
Type ./configure into the Terminal window and press Enter

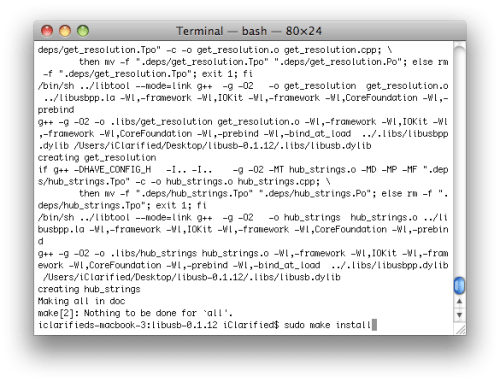
Type make into the Terminal window and press Enter
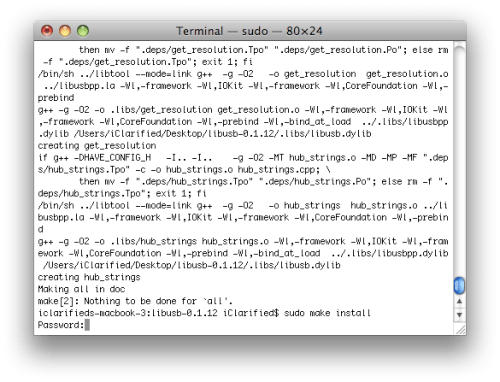
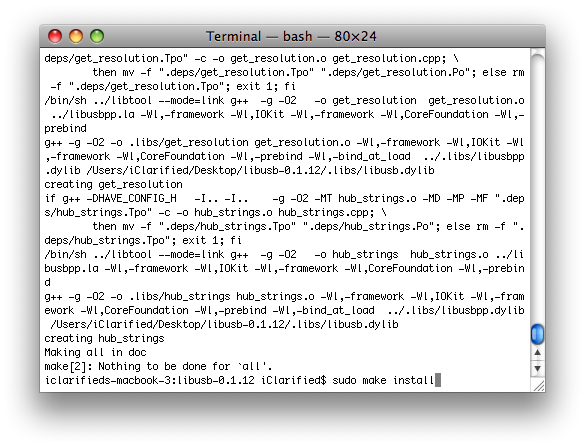
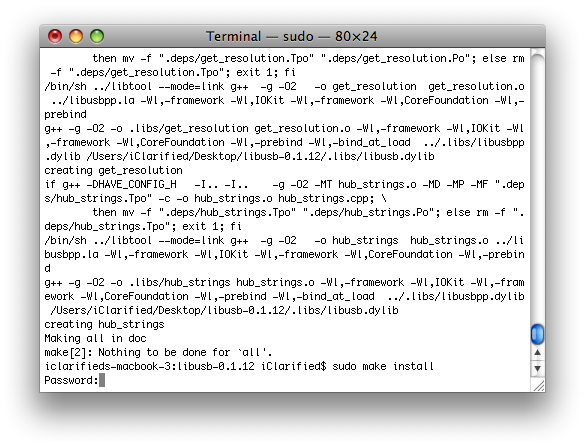
Type sudo make install into the Terminal window and press Enter
You will be asked to provide your administrator password for Mac OS X. Please do this then press Enter
Installation of libusb will complete shortly.
Step Seventeen
Now we need to apply the untethered patch. Download 24kpwn.zip to your desktop and double click to extract it.
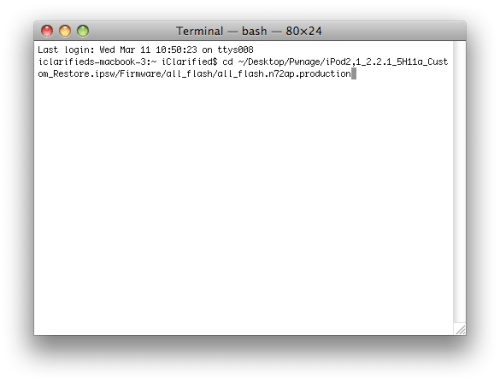
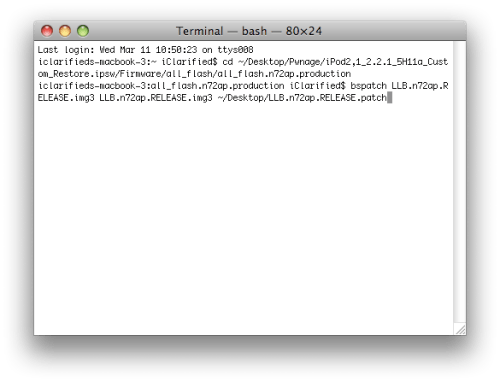
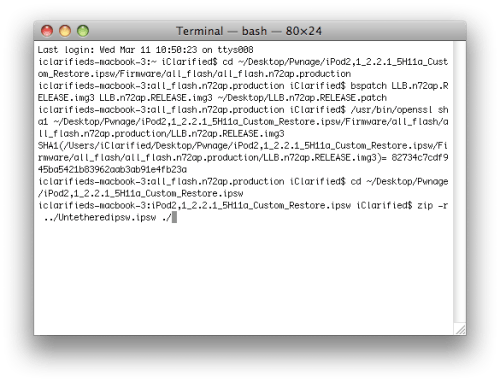
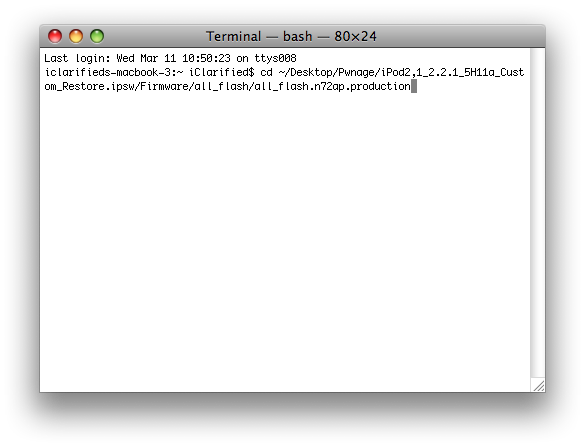
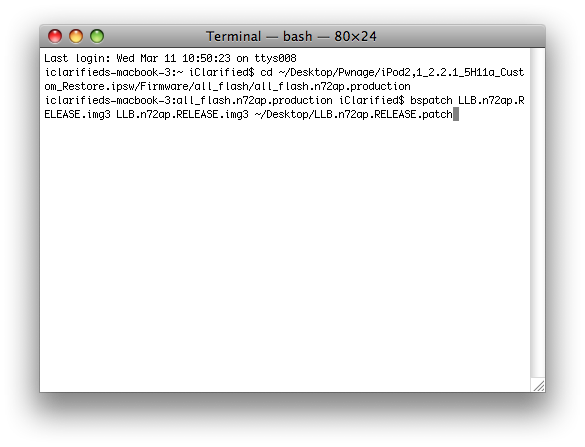
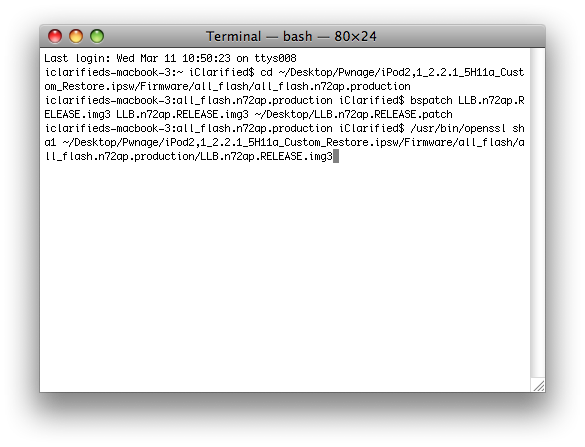
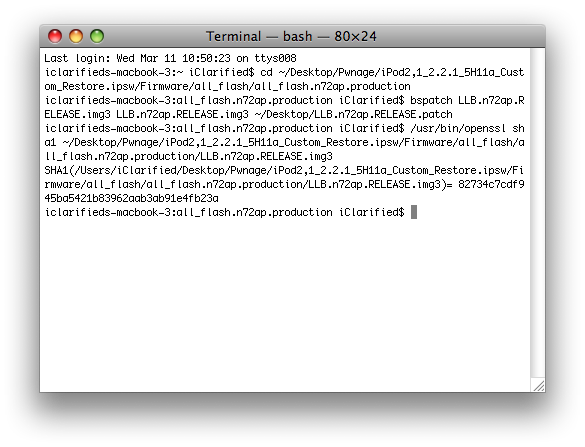
In the Terminal window type cd ~/Desktop/Pwnage/iPod2,1_2.2.1_5H11a_Custom_Restore.ipsw/Firmware/all_flash/all_flash.n72ap.production and press enter.
Then input bspatch LLB.n72ap.RELEASE.img3 LLB.n72ap.RELEASE.img3 ~/Desktop/LLB.n72ap.RELEASE.patch and press enter.
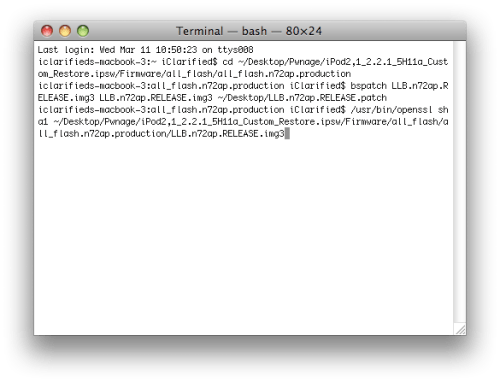
To confirm the patch was successful type /usr/bin/openssl sha1 ~/Desktop/Pwnage/iPod2,1_2.2.1_5H11a_Custom_Restore.ipsw/Firmware/all_flash/all_flash.n72ap.production/LLB.n72ap.RELEASE.img3 then press enter. The SHA1 code should be 82734c7cdf945ba5421b83962aab3ab91e4fb23a.
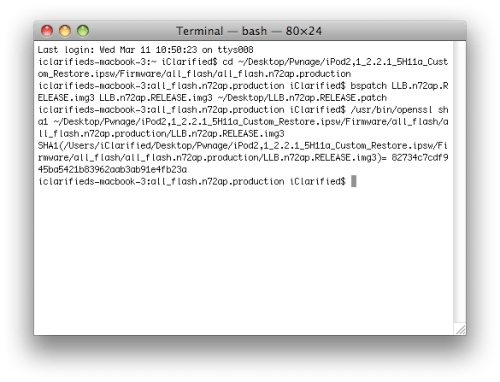
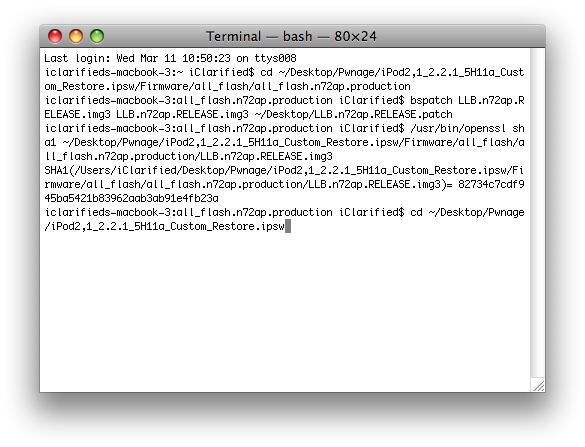
Type in cd ~/Desktop/Pwnage/iPod2,1_2.2.1_5H11a_Custom_Restore.ipsw then press enter to change folders.
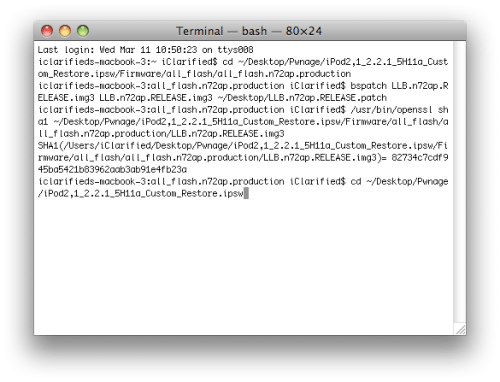
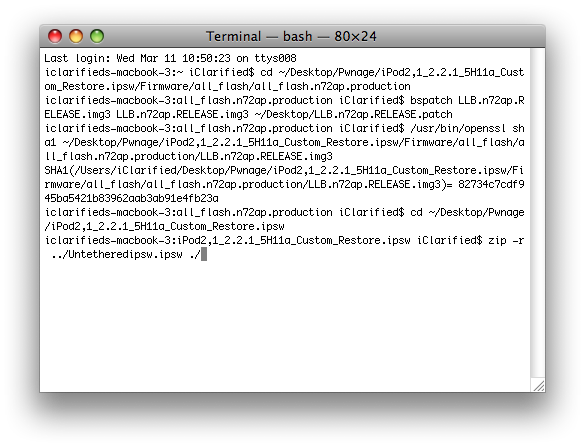
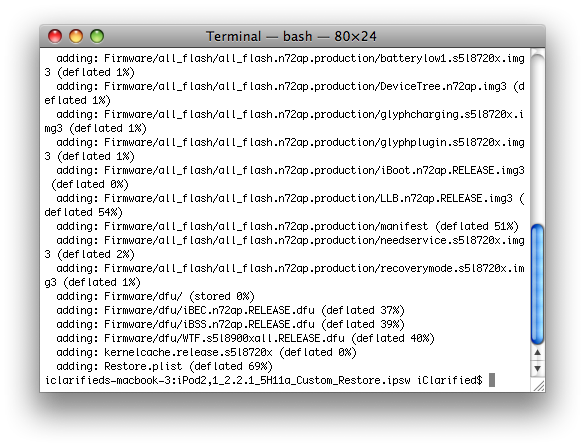
Finally type zip -r ../Untetheredipsw.ipsw ./ then press enter to create an untethered ipsw file.

Step Eighteen
You will now need to put your iPod touch 2G into DFU mode. Make sure the iPod touch is connected to the computer and then follow these instructions. If you have Mac OS X 10.5.6 you will first need to enable DFU mode on your computer by using one of these suggestions.
Step Nineteen
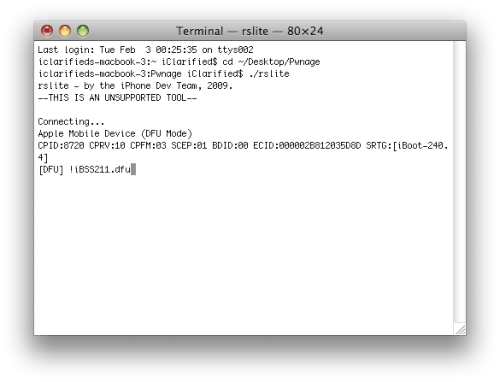
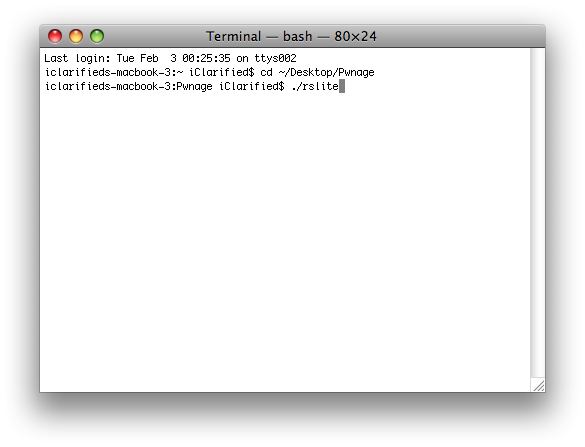
In the Terminal window type cd ~/Desktop/Pwnage and press Enter

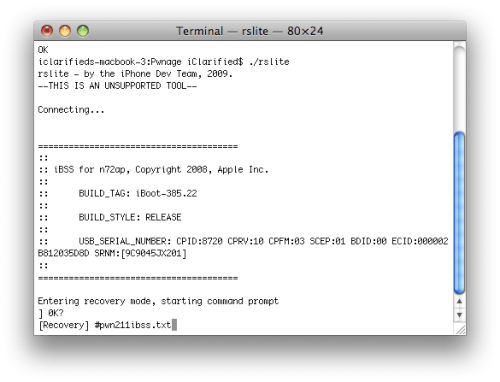
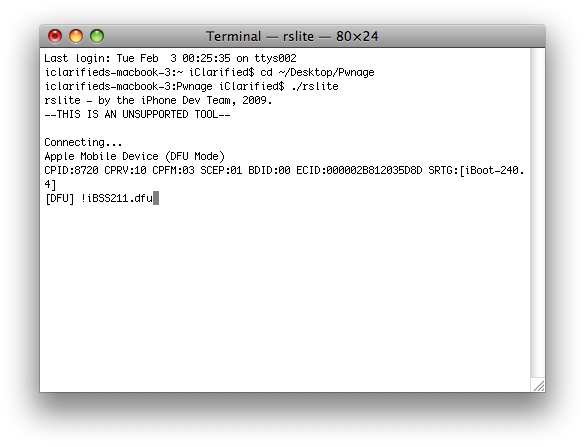
Make sure your iTunes application is QUIT. Then type ./rslite and press Enter

Your iPhone will be detected. Input !iBSS211.dfu then press Enter.
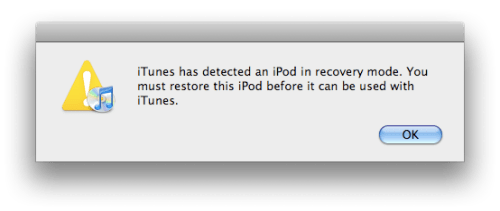
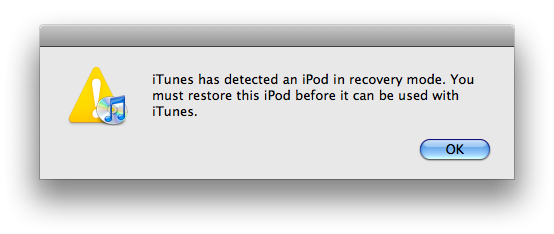
If iTunes pops up with a recovery mode message just ignore it for now.
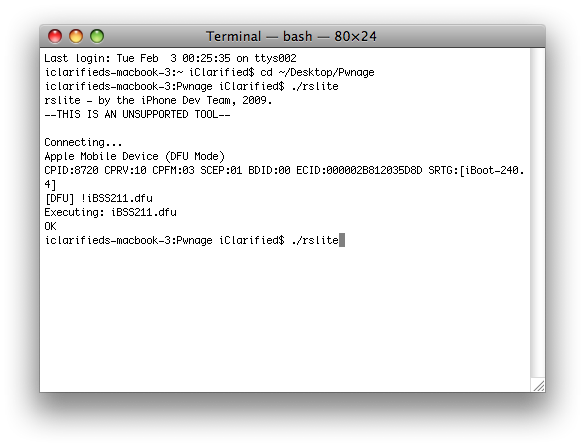
Once the program executes and exits type ./rslite into the Terminal window and press Enter
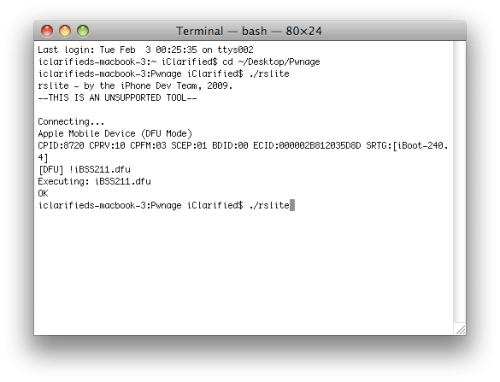
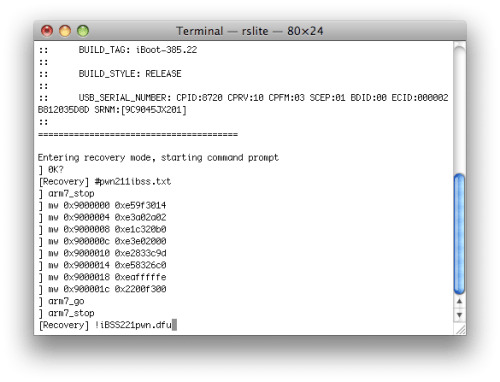
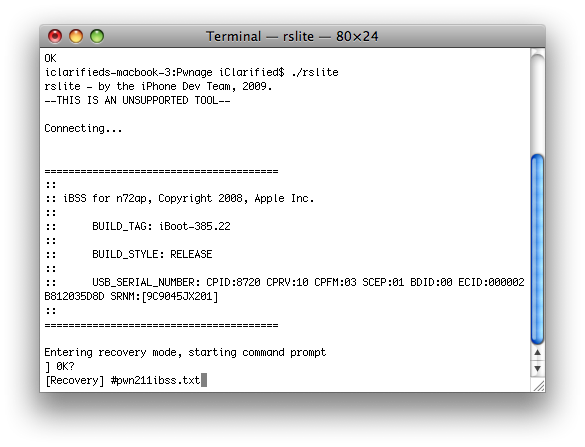
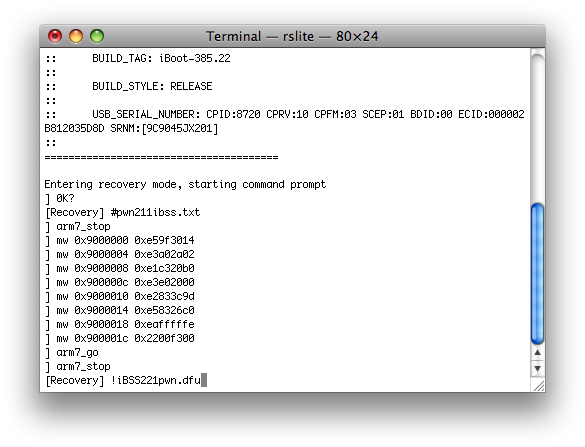
Your iPhone will be detected again. Input #pwn211ibss.txt then press Enter
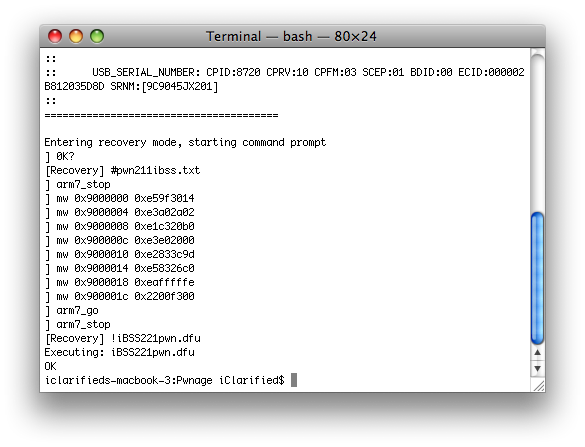
Once the process has completed input !iBSS221pwn.dfu and press Enter
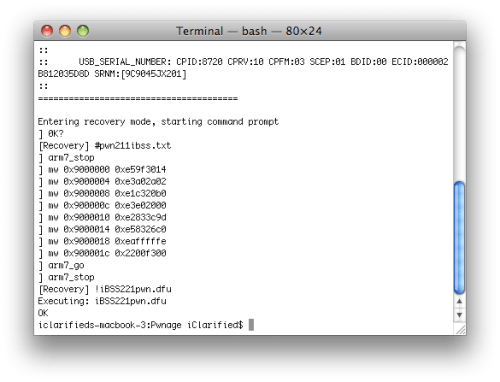
Step Twenty
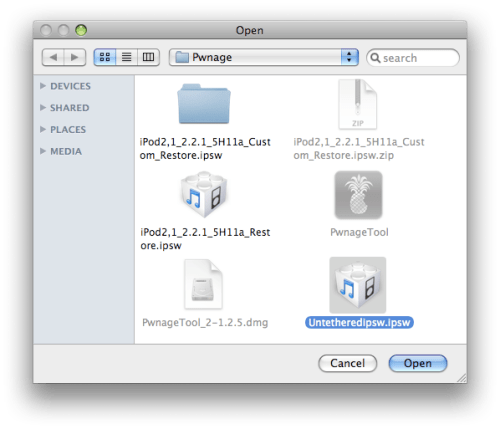
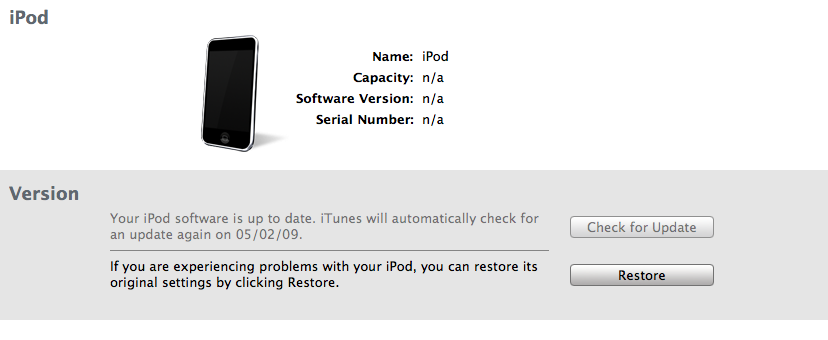
Now we can go to iTunes and restore to our custom firmware. Hold down the option key and press the Restore button.
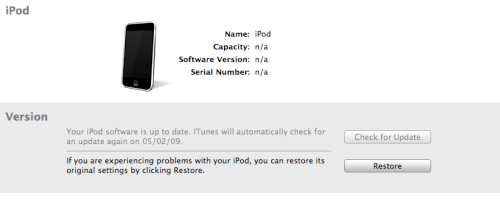
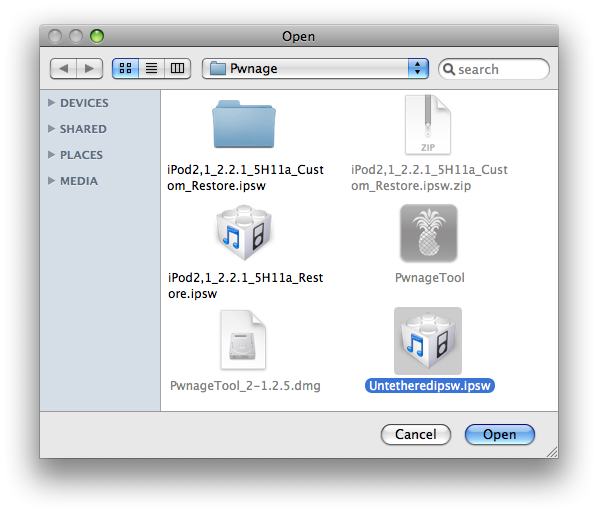
Select your Untethered.ipsw file from the Pwnage folder on your desktop and click Open
Once the firmware has installed you will be informed that Your iPod has been restored to factory settings and is restarting.
Step Twenty One
Thats It! You now have an untethered 2G iPod Touch!

------------------------------------------- |  06.38
06.38
 ipod touch review


 Posted in: Jailbreak,Mac


0 komentar:
Posting Komentar